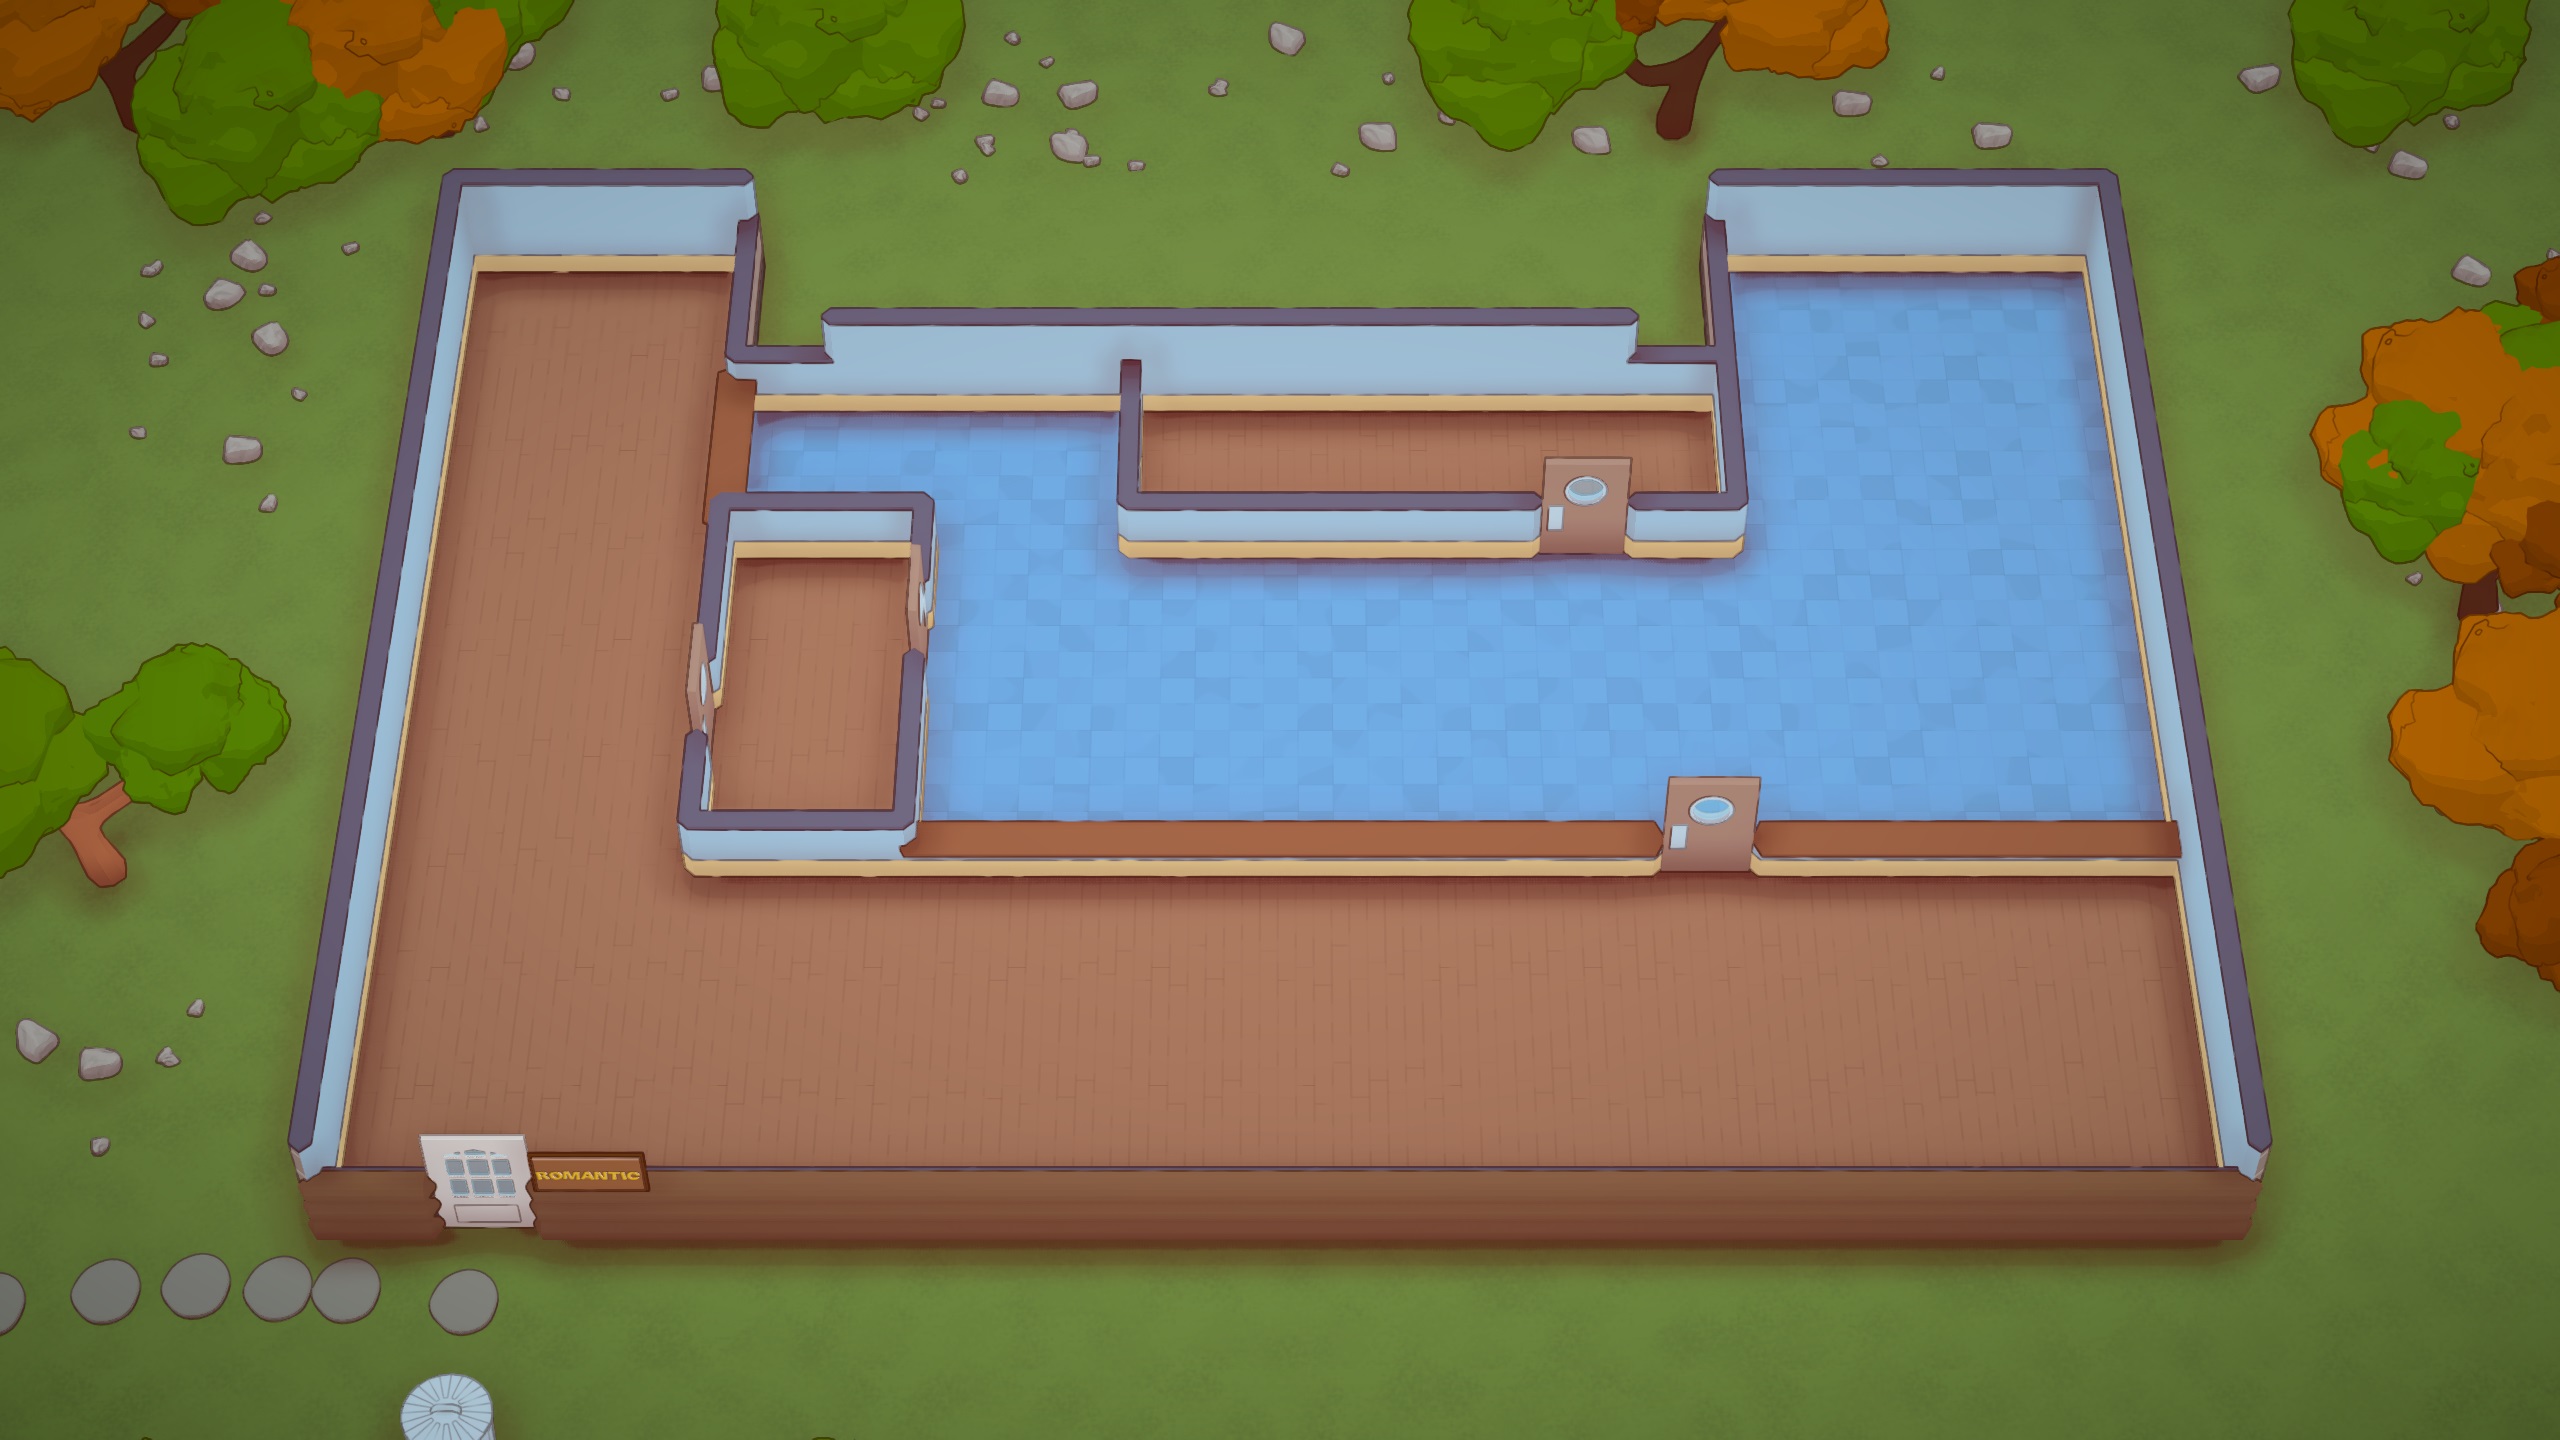
A LayoutProfile is a GameDataObject that stores the procedural generator configuration used to create layouts for restaurants.
¶ Class Definition
public class LayoutProfile : GameDataObject, IUpgrade
{
    public LayoutGraph Graph;	// NodeGraph
    public int MaximumTables = 3;	// Number of tables to generate
    public List<GameDataObject> RequiredAppliances;	// Appliances to provide for a new restaurant (Excluding tables)
    public GameDataObject Table;	// Appliance for tables
    public GameDataObject Counter;	// Appliance for counters
    public Appliance ExternalBin;
    public Appliance WallPiece;
    public Appliance InternalWallPiece;
    public Appliance StreetPiece;	// Floor

    public LocalisationObject<BasicInfo> Info;
    public string Name = "New Layout";
    public string Description = "A new layout type for your restaurants!";
}
¶ LayoutGraph
LayoutGraph is a XNode.NodeGraph that uses LayoutModule nodes to produce a LayoutBlueprint. Anything immovable objects within the bounds (rectangular area excluding the sidewalk) of the restaurant is generated using a LayoutGraph.
¶ Terminology
Before going any further, we should clearly define some common terms that will be used to describe a layout.
¶ LayoutBlueprint
Contains information about all tiles and features in a layout instance.
¶ LayoutPosition
2-dimensional value, where each component is an integer, that defines the coordinates of a tile within a LayoutBlueprint. The bottom-left most tile is defined to be at LayoutPosition (0, 0) when the LayoutBlueprint is created, where X increases moving right and Y increases moving up. As tiles are added and/or moved, the bottom-left tile will not necessarily always be at (0, 0).
¶ Tile
Unit of space in a layout. This contains the following information relevant to layout generation:
-
Room ID
-
Room Type (Kitchen/Dining/Garden etc.)
-
LayoutPosition
¶ Room
Group of tiles with the same ID.
¶ Feature
Elements that are used to divide rooms (excluding walls). Which kind of feature it is depends on it's Feature Type. These are mainly doors and hatches.
¶ LayoutModule
Each LayoutModule is a simple building block performs a single function. I will be grouping the modules into X module groups. Namely:
-
Input
-
Tile (Adding/Grouping/Modifying tiles)
-
Feature (Adding/Selecting/Modifying features)
-
Global Modifier (Affects both tiles and features)
-
Conditional (Validating feature count and positions)
-
Output
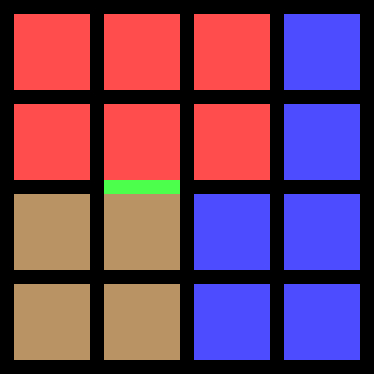
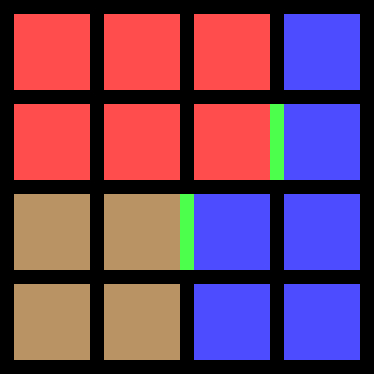
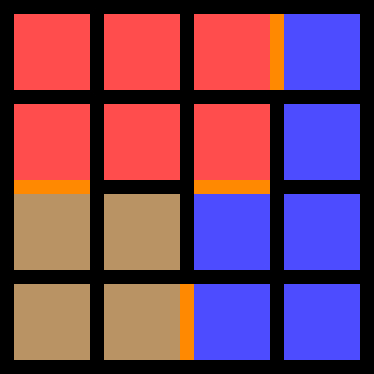
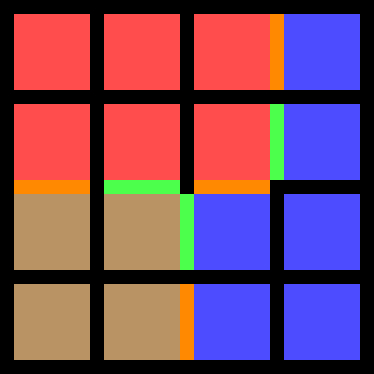
You can find abstracted explanations for each base game layout module. For all grid diagrams, white squares and black borders are treated should be treated as unassigned tiles/features unless otherwise stated. Tile colors are used to distinguish between different rooms/features, and do not represent a specific Room Type or Feature Type unless mentioned.
¶ Input Modules
These are used to define the general shape of the layout by initializing a LayoutBlueprint and populating it with tiles. Avoid using the final size of the layout. Instead try using the aspect ratio of the layout, or size of a single room (Dividing the width and height by their greatest common factor). This reduces the number of tiles, thereby lowering the complexity of creating the LayoutGraph and improving performance. Adding more tiles and scaling the layout can be done later using Tile Modules.
You must have exactly one input module.
¶ NewFromTexture
Creates a new LayoutBlueprint from a Texture2D where each pixel represents a single tile, and pixels with exact matching colors are joined into a room. This does not set the Room Type.
¶ RoomGrid
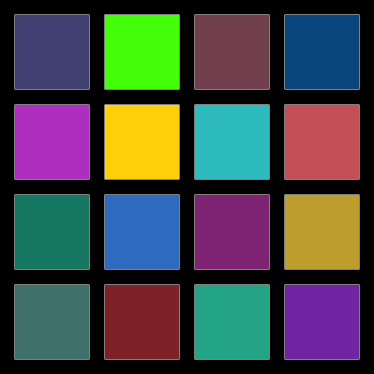
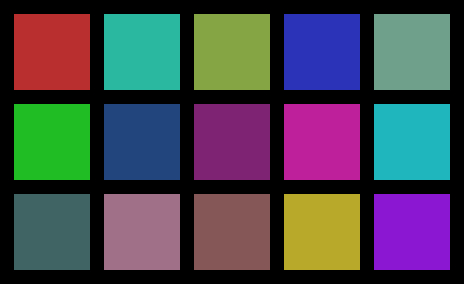
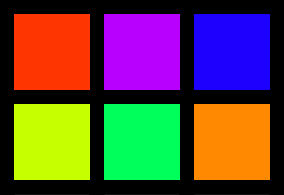
Creates a new LayoutBlueprint with a specified Height and Width and populates it with tiles, filling the area. Optionally set all tiles to an assigned Room Type.
 |
 |
|---|---|
| Width = 4, Height = 4 | Width = 5, Height = 3 |
Each tile will have a different Room ID and hence do not form a single room.
¶ Tile Modules
Adding, grouping and modifying tiles
¶ CreateRoomByJoins
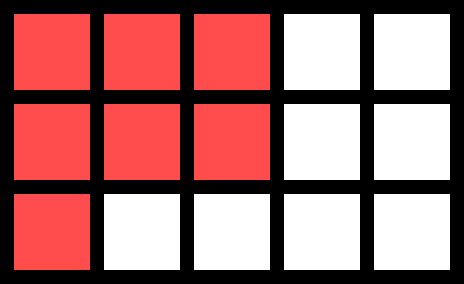
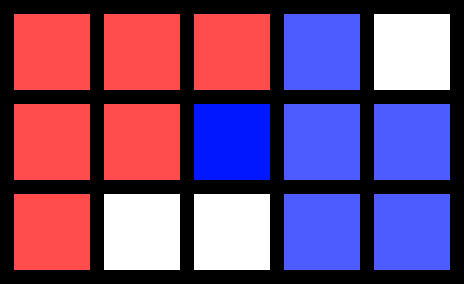
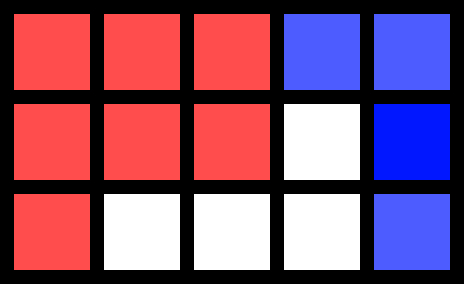
Starting from a chosen tile at (StartX, StartY), chooses n adjacent from all connected tiles with unassigned Room Type. All selected tiles will share the same room, and all tiles (including the start tile) will be set to an assigned Room Type. White represents unassigned Room Type.
 |
 |
 |
|---|---|---|
| Before | StartX = 2 StartY = 1 Joins = 5 |
StartX = 4 StartY = 1 Joins = 3 |
¶ SetRoom
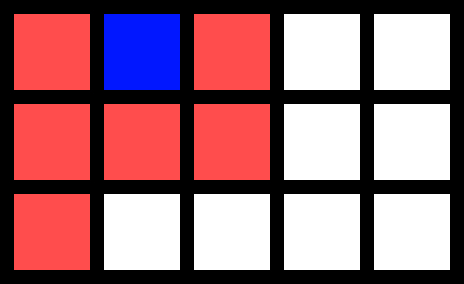
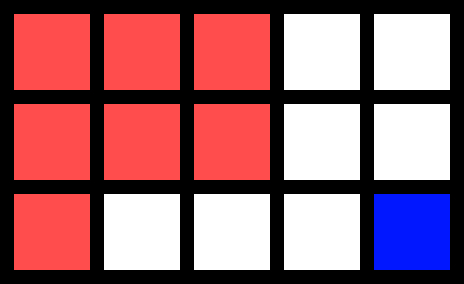
Replaces tile at position (X, Y) with a new tile, and assigns Room Type.
 |
 |
|---|---|
| X = 1 Y = 2 |
X = 4 Y = 0 |
¶ InsertRandomRoom
Similar to SetRoom. Replaces tile at a randomly selected LayoutPosition with a new tile, and assigns Room Type,
¶ SetLine
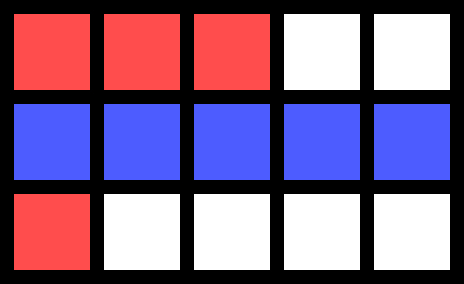
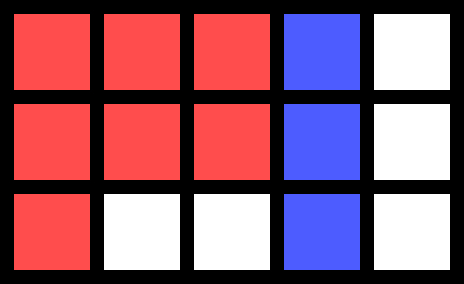
Replace a row or column of tiles, where all tiles in the line share the same new room. The Position of the line is a 0-indexed integer counting from the bottom (for row) or left (for column) of the layout. Also assigns a Room Type,
 |
 |
|---|---|
| Position = 1 IsRow = true |
Position = 3 IsRow = false |
¶ PadWithRoom
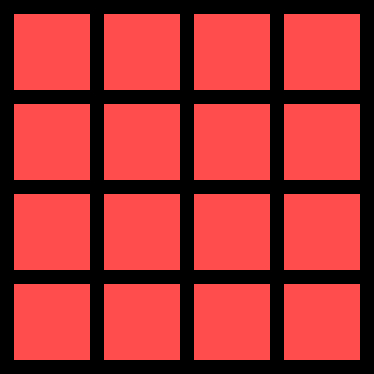
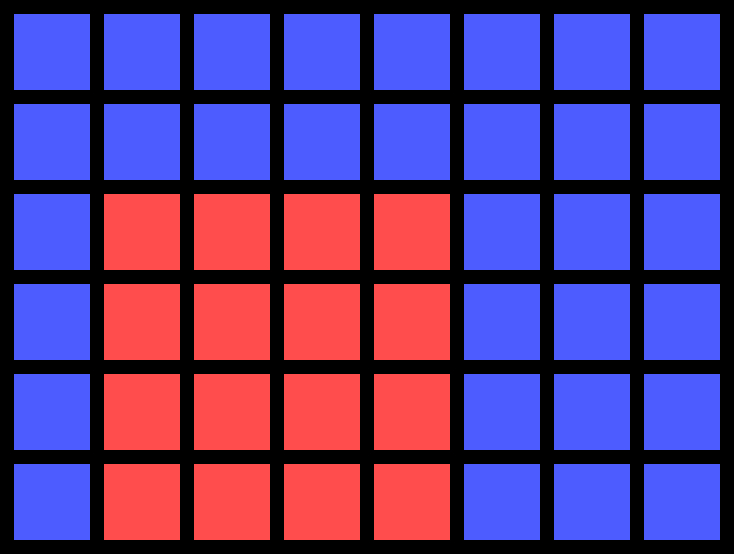
Expands the layout, adding an arbitrary number of new tiles along the Top, Bottom, Left and/or Right, where all tiles share the same room.
 |
 |
|---|---|
| Before (4x4) | Bottom = 0, Left = 1, Top = 2, Right = 3 (8x6) |
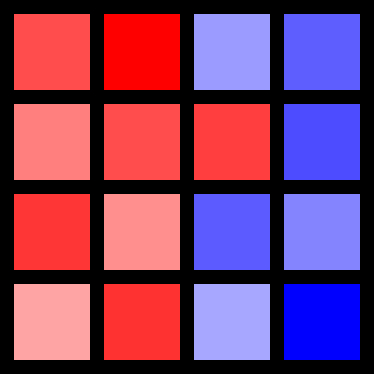
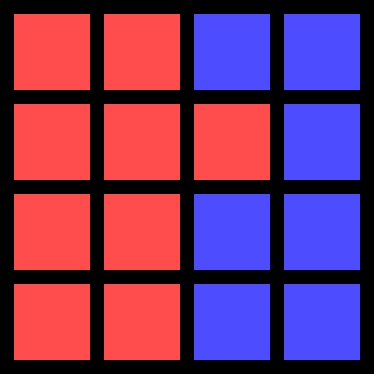
¶ MergeRoomByType
Joins all adjacent tiles with the same Room Type into a single room. Squares of similar hue represent the same Room Type, but different Room ID.
 |
 |
|---|---|
| Before | After |
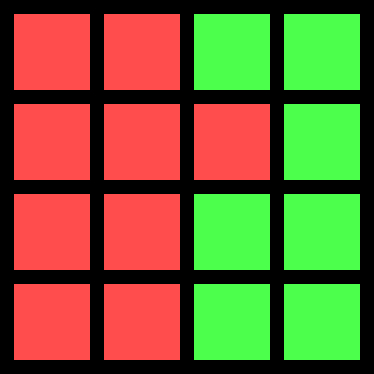
¶ SwapRoomType
Changes all tiles sharing a Room with selected tile at (X, Y) to an assigned Room Type. Color in images represent Room Type, where all tiles with the same Room Type share the same room.
 |
 |
|---|---|
| Before | X = 2 Y = 1 |
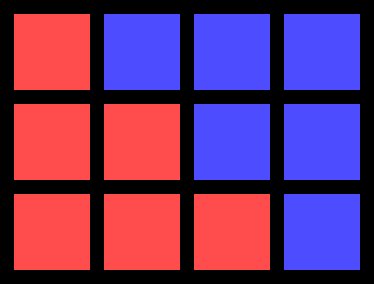
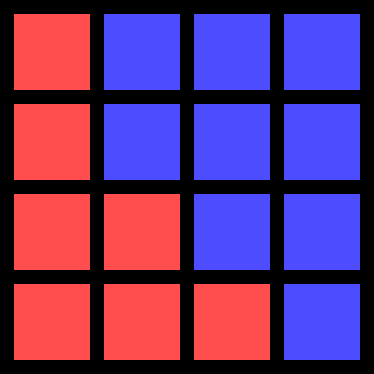
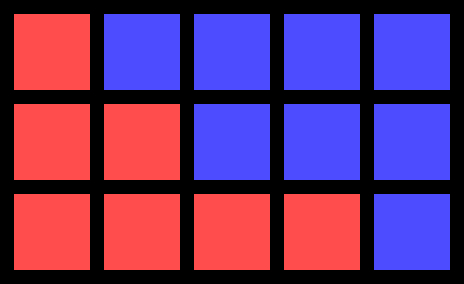
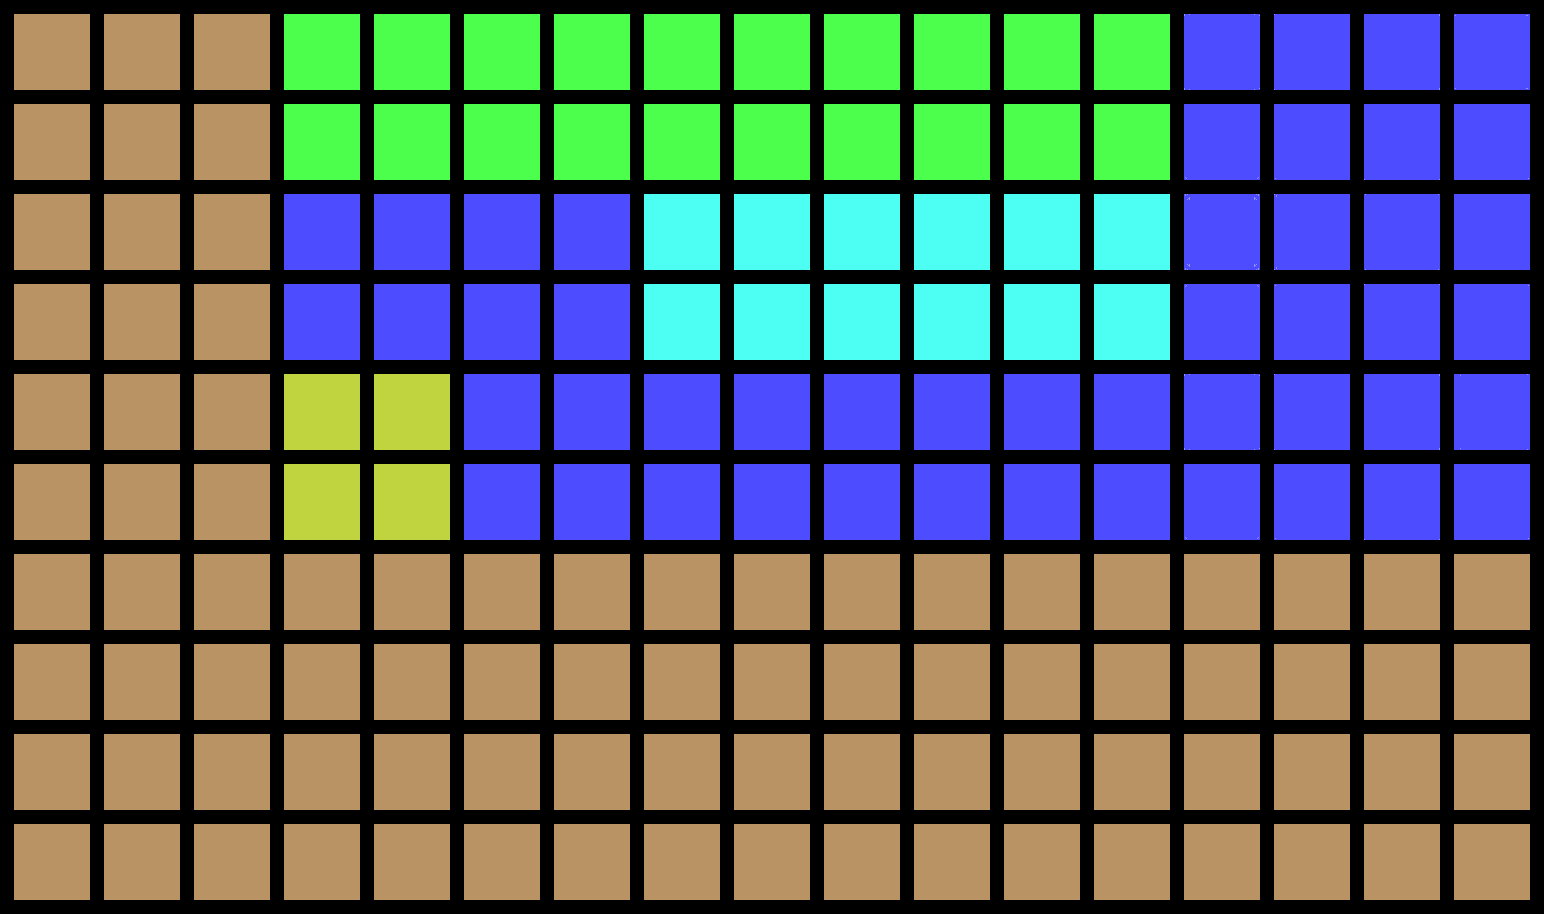
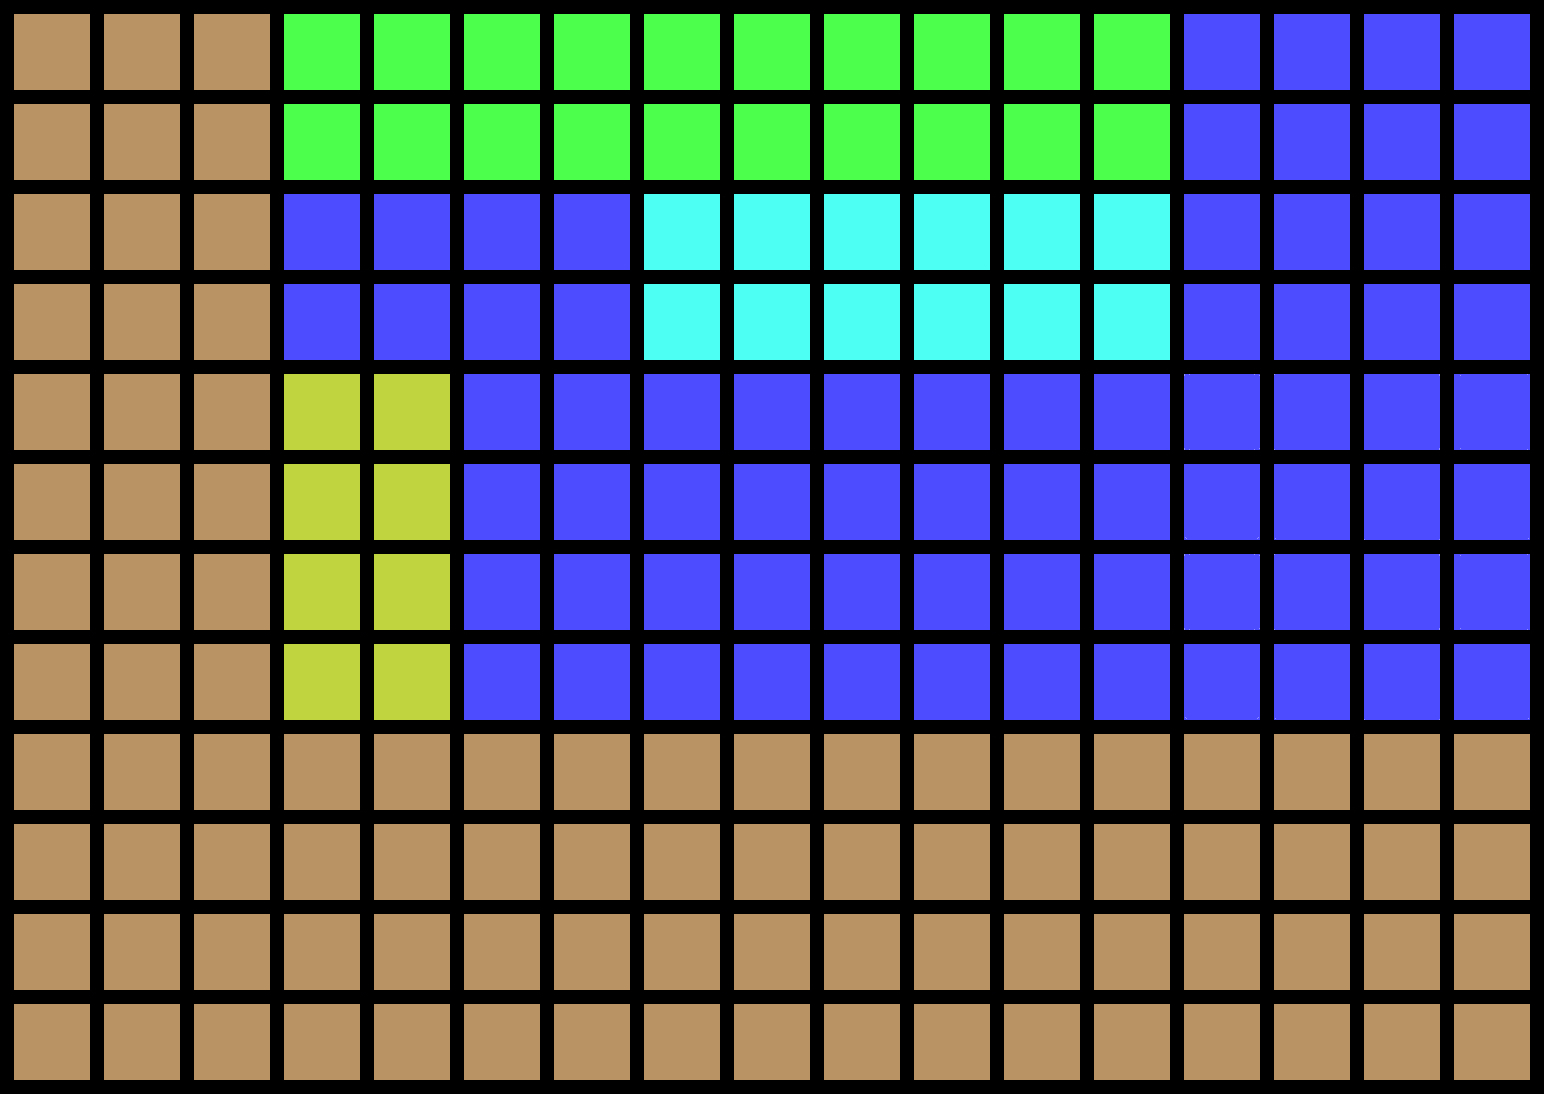
¶ SplitLine
Insert n + 1 rows or columns of tiles, expanding the layout vertically/horizontally by n + 1 tiles. The Position of the line is a 0-indexed integer counting from the bottom (for row) or left (for column) of the layout. New tiles in the line share the same room as the tile that was originally at their individual LayoutPosition.
 |
 |
 |
|---|---|---|
| Before (4x3) | Position = 2 IsRow = true Count = 0 (4x4) |
Position = 2 IsRow = false Count = 0 (5x3) |
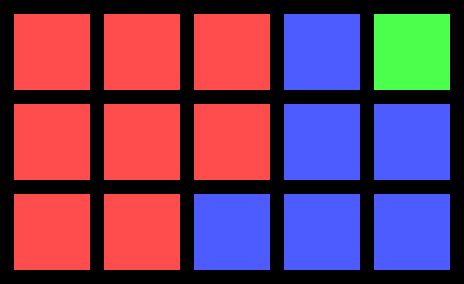
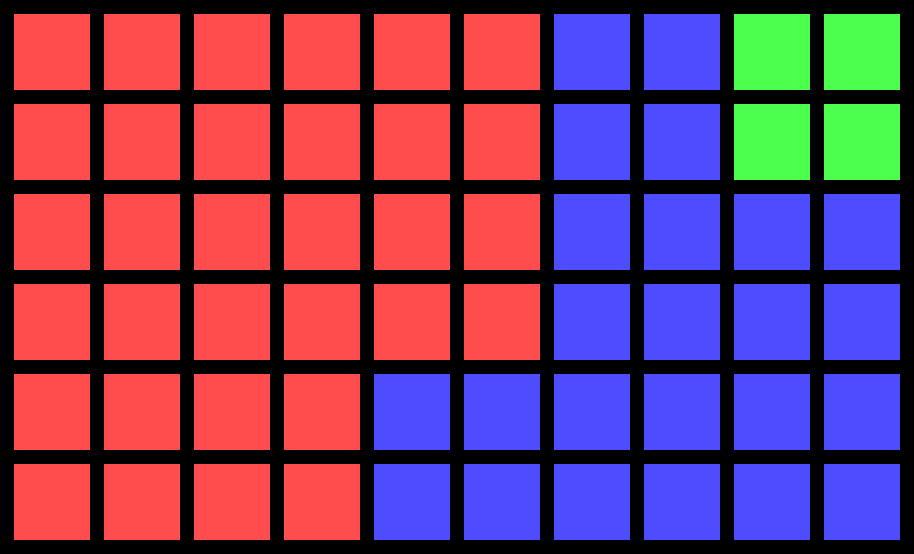
¶ SplitRooms
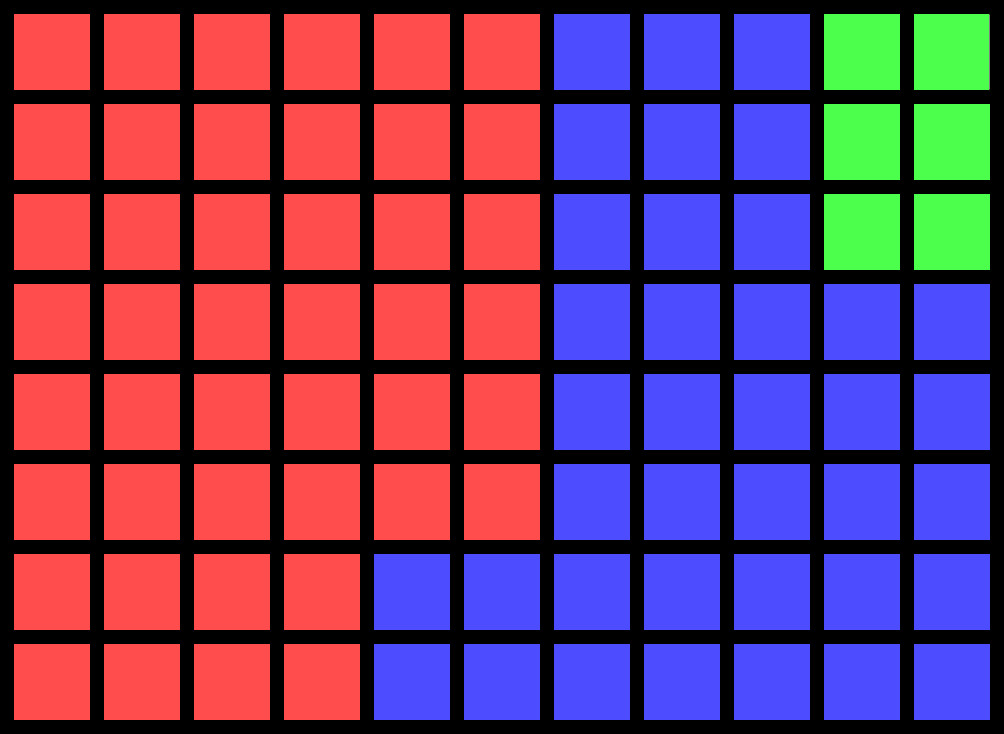
Scales the entire layout up by UniformX + 1 in width and UniformY + 1 in height, expanding each tile into multiple tiles by the same amount to fill the space. Also runs SplitLine RandomX times for rows and RandomY times for columns at with random positions (with Count = 0)
 |
 |
 |
|---|---|---|
| Before (5x3) | UniformX = 1, UniformY = 1 RandomX = 0, RandomY = 0 (10x6) |
UniformX = 1, UniformY = 1 RandomX = 2, RandomY = 1 (11x8) |
¶ Feature Modules
Adding, selecting and modifying features. The general strategy when adding features is to duplicate the current LayoutBlueprint, creating each Feature Type separately. Then, merge all features into one LayoutBlueprint.
In this section, the term 'orientation' refers to the horizontal or vertical arrangement of a feature when viewed from top-down.
¶ FeaturesFromTexture
Adds features between all adjacent tile pairs of the same color in Texture2D where each pixel represents a single tile, and both tiles are not in the same room. If the alpha component of a pixel's color is 0, it is ignored.
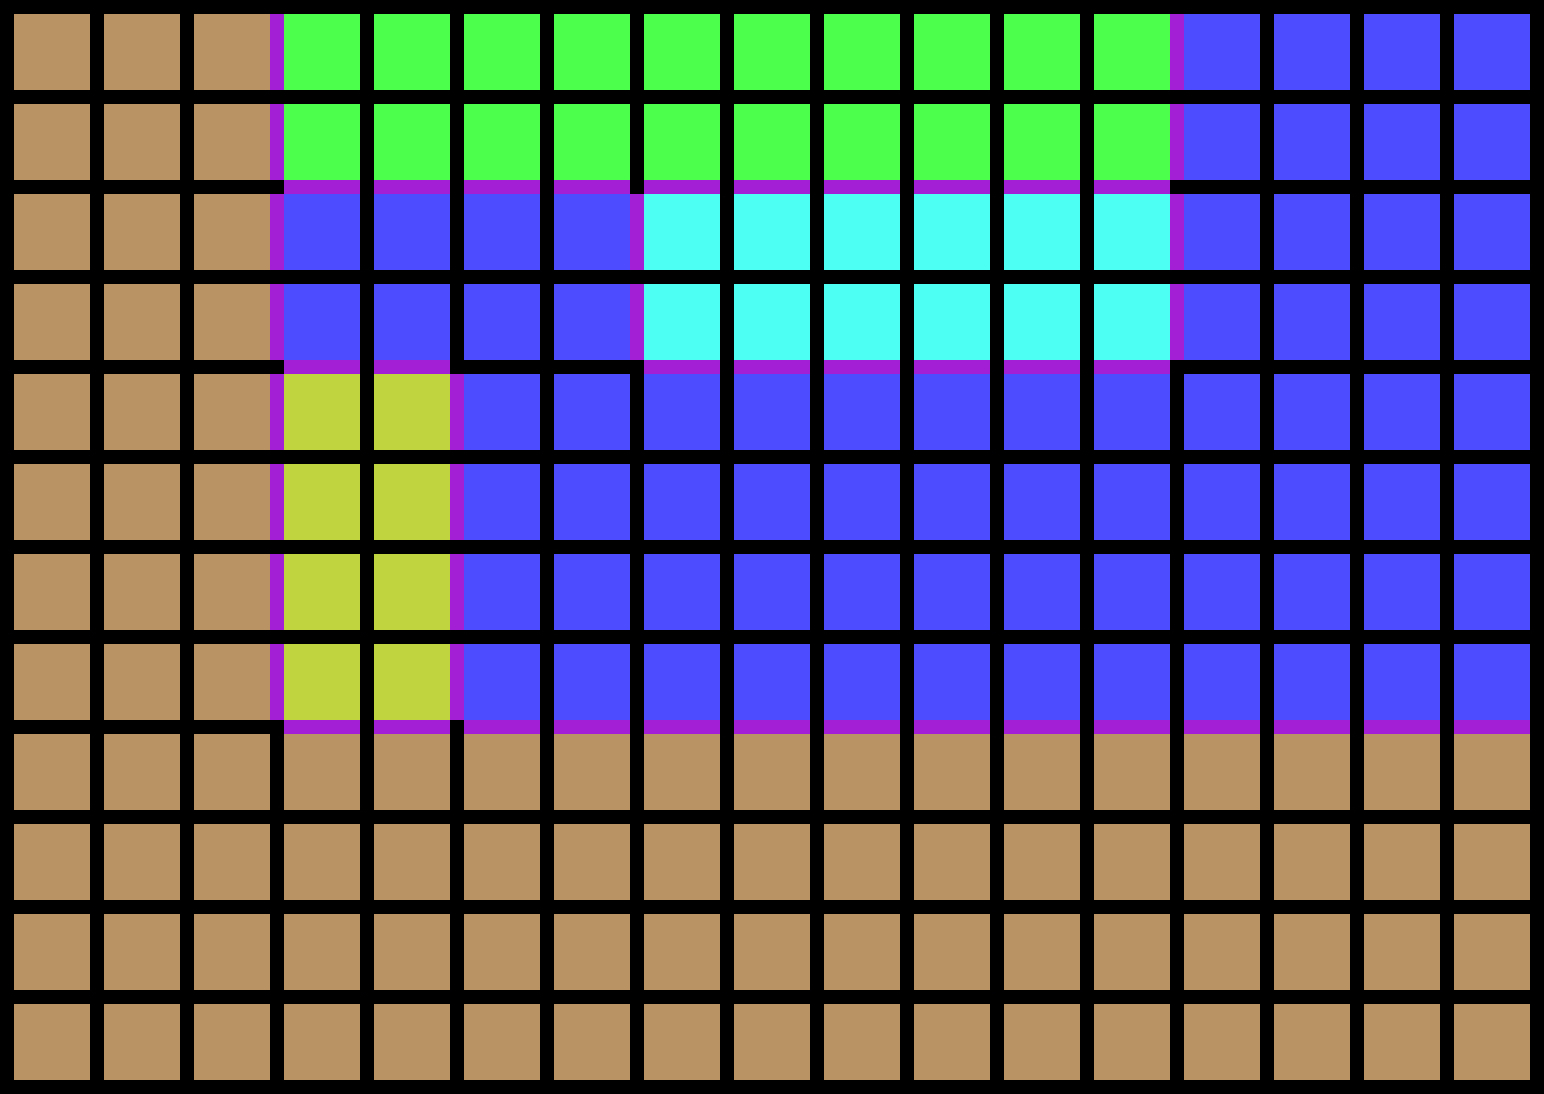
¶ FindAllFeatures
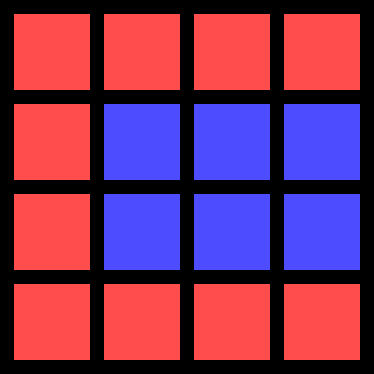
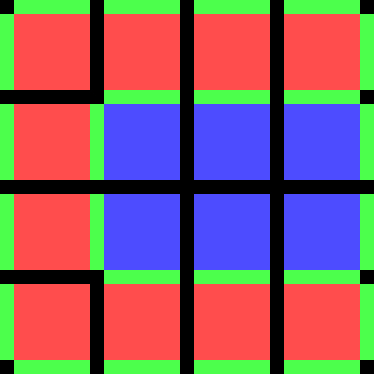
Adds a feature between every adjacent tile pair, where both tiles are not in the same room.
 |
 |
|---|---|
| Before | After |
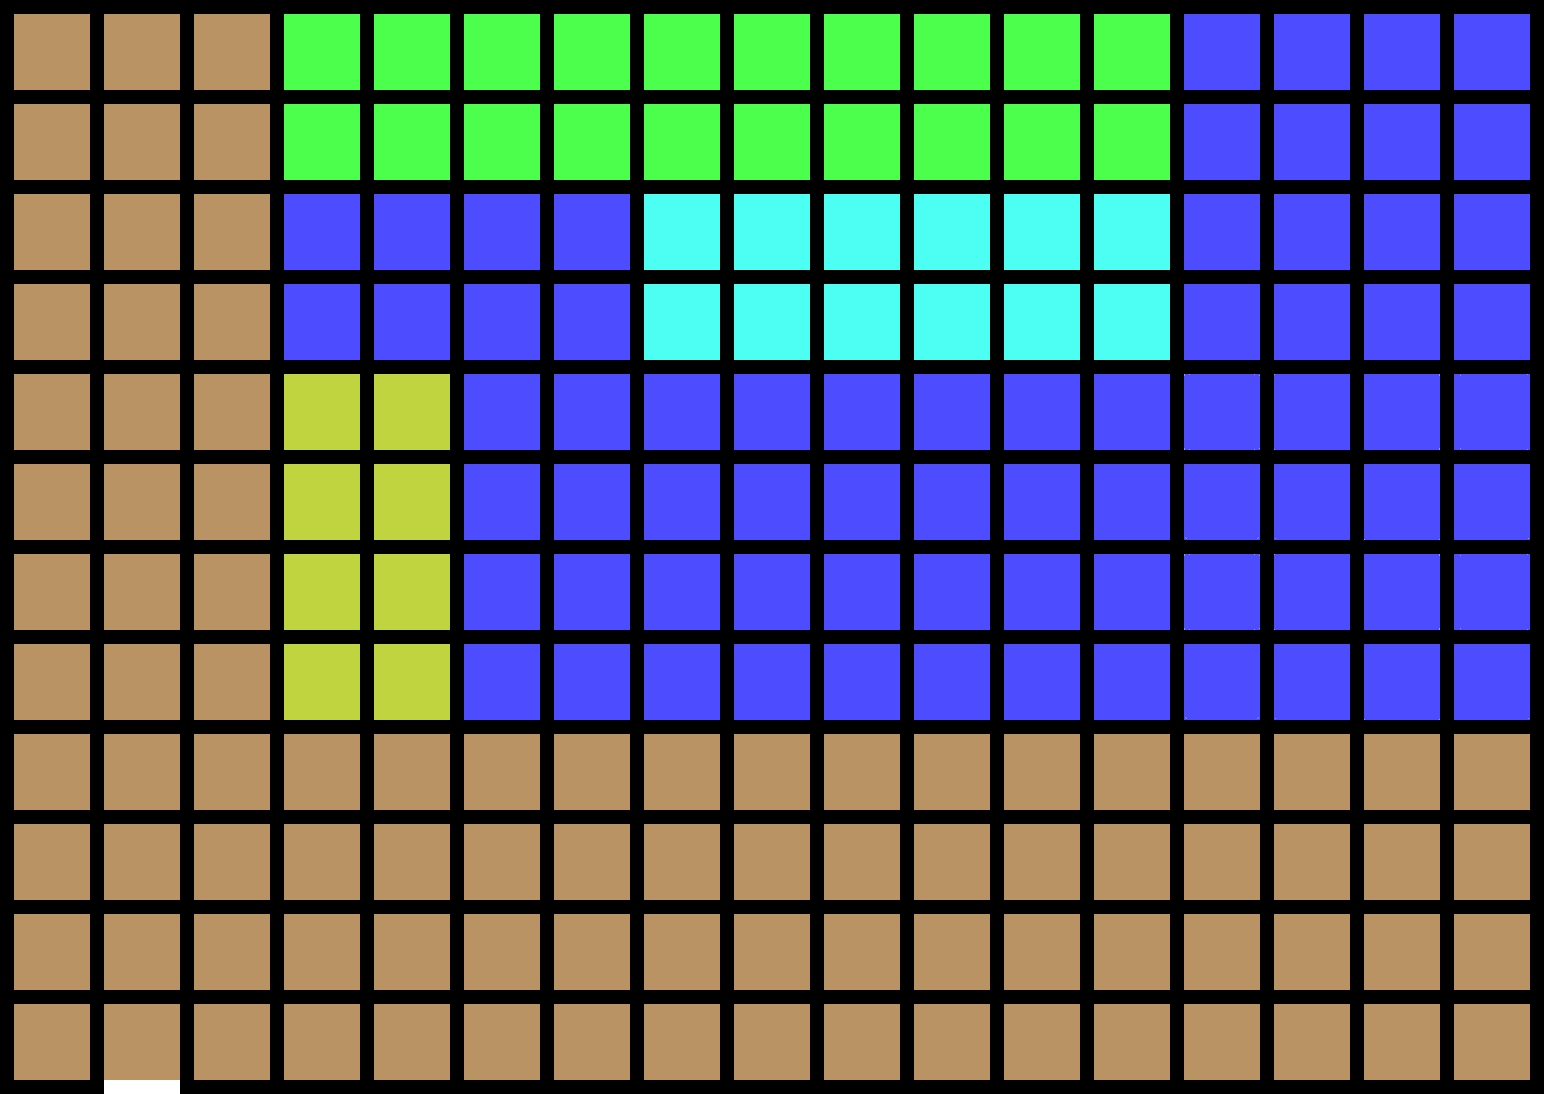
¶ CreateFrontDoor
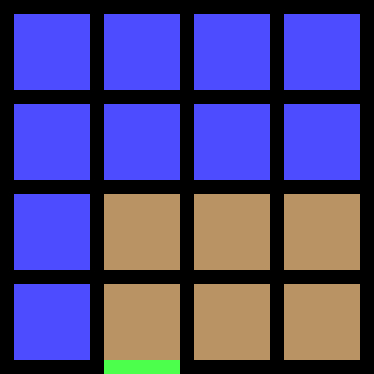
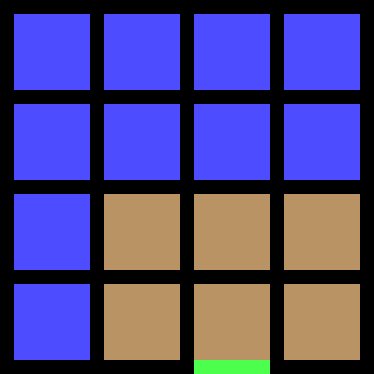
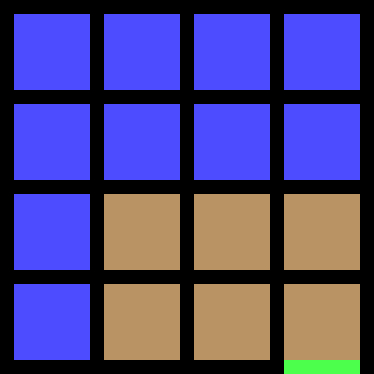
Adds a Front Door feature, leading into an assigned Room Type. The position can be constrained to only be on the left half of the restaurant if desired. Brown tiles represent RoomType.Dining.
   |
 |
|---|---|
| Type = RoomType.Dining ForceFirstHalf = false (Random) |
Type = RoomType.Dining ForceFirstHalf = true |
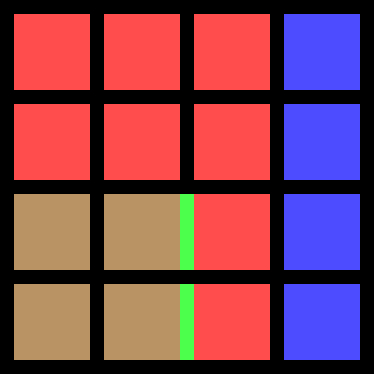
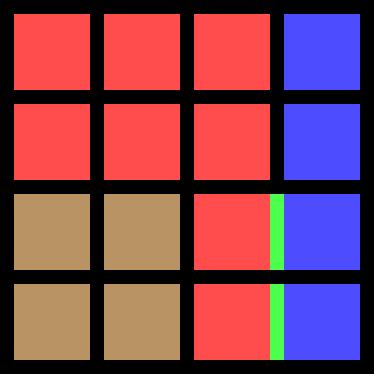
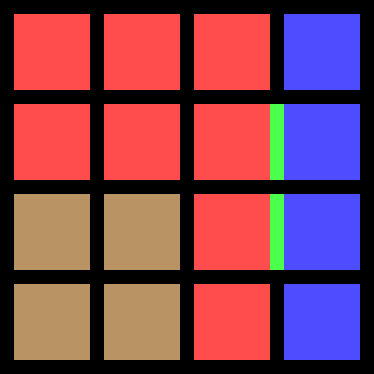
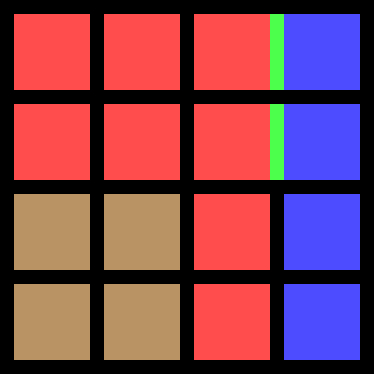
¶ FilterAdjacentPair
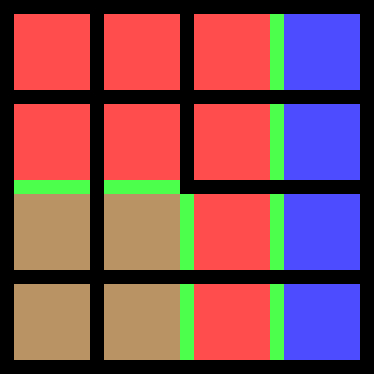
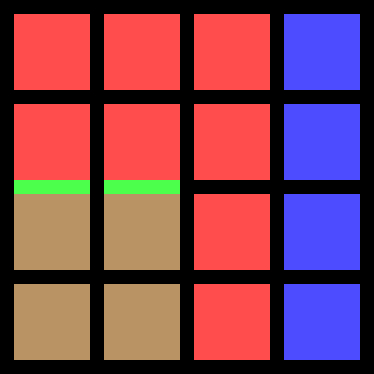
Randomly select two features that are positioned next to each other and in the same orientation. Discards all other features.
 |
     |
|---|---|
| Before | After (Random) |
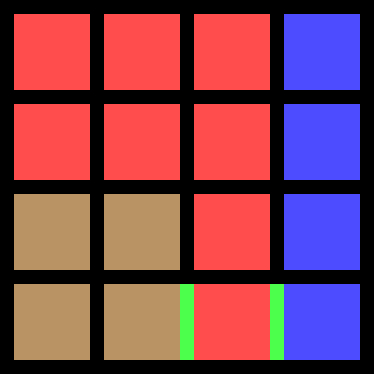
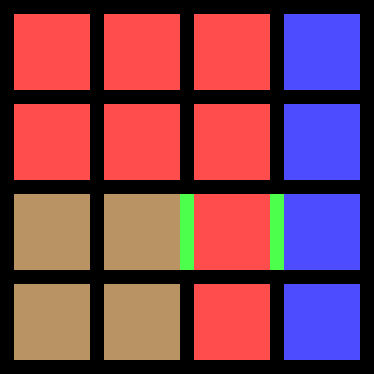
¶ FilterOppositePair
Randomly select two features that are positioned facing each other in the same orientation. Discards all other features.
 |
  |
|---|---|
| Before | After (Random) |
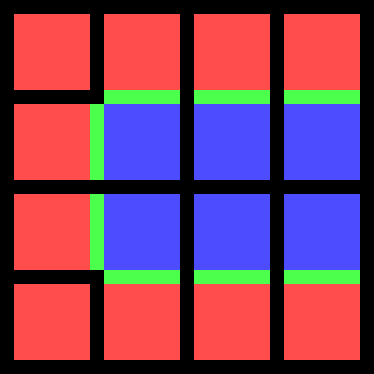
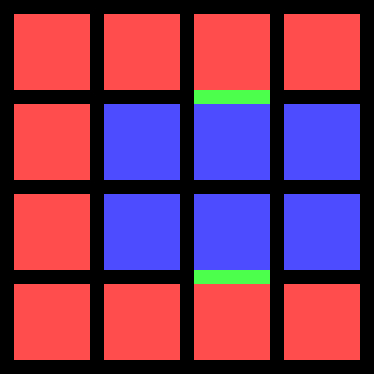
¶ FilterByFreeSpace
Discards all features positioned next to a wall with opposing orientation.
 |
 |
|---|---|
| Before | After (Random) |
 |
 |
|---|---|
| Before | After (Random) |
¶ FilterByRoom
Select/Discard features between rooms, where one or both tiles have Room Type matching the filter. If RemoveMode = true, filtered features are removed. Otherwise, filtered features are selected.
For this example,
RoomType.Dining is brown
RoomType.Kitchen is red
RoomType.Garden is blue.
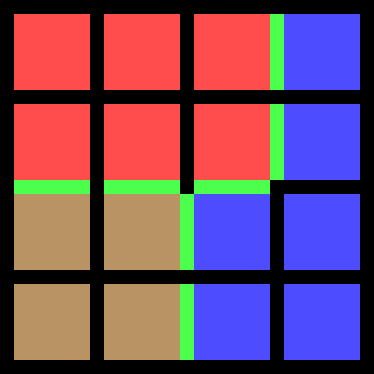 |
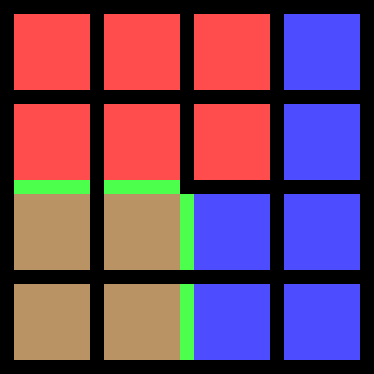 |
|---|---|
| Before | RemoveMode = true FilterSecond = true Type1 = RoomType.Garden Type2 = RoomType.Kitchen |
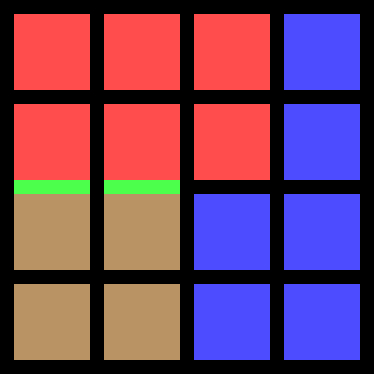 |
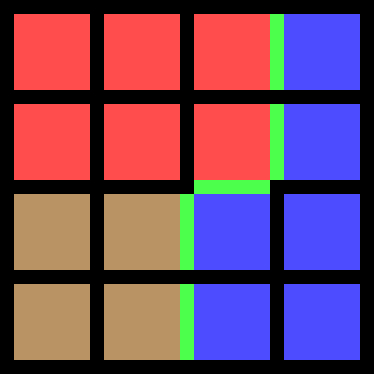 |
| RemoveMode = true FilterSecond = false Type1 = RoomType.Garden |
RemoveMode = false FilterSecond = false Type1 = RoomType.Garden |
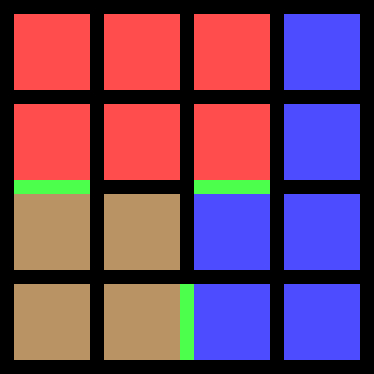
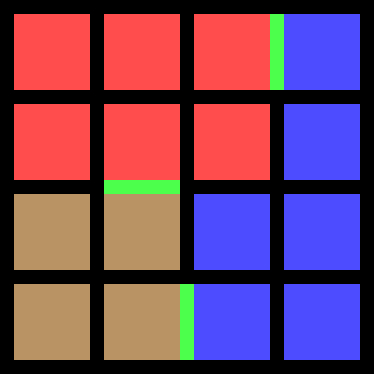
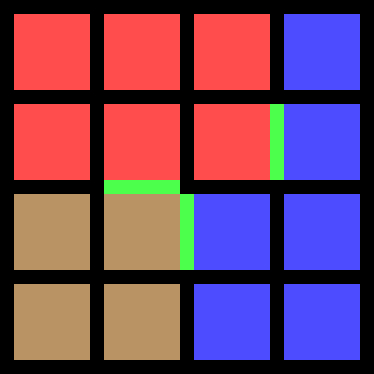
¶ FilterOnePerPair
Randomly select one feature between each adjacent room pair. Discards all other features.
 |
   |
|---|---|
| Before | After (Random. Non-exhastive) |
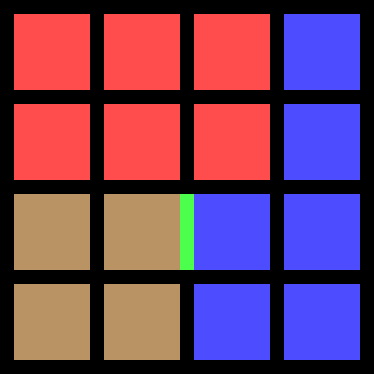
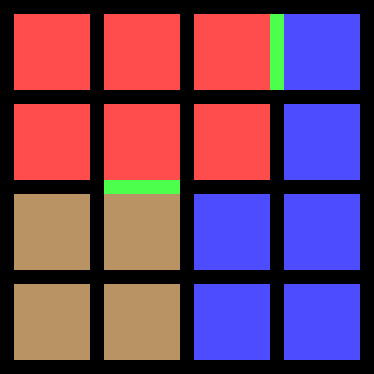
¶ FilterSelectCount
Select n features randomly. Discards all other features.
 |
 |
|---|---|
| Before | Count = 1 |
 |
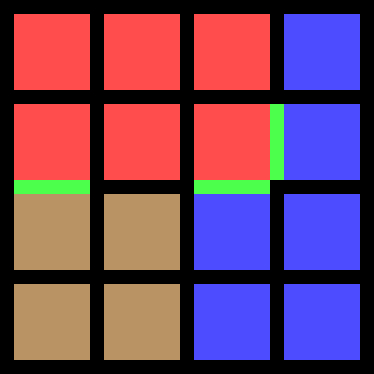 |
| Count = 2 | Count = 3 |
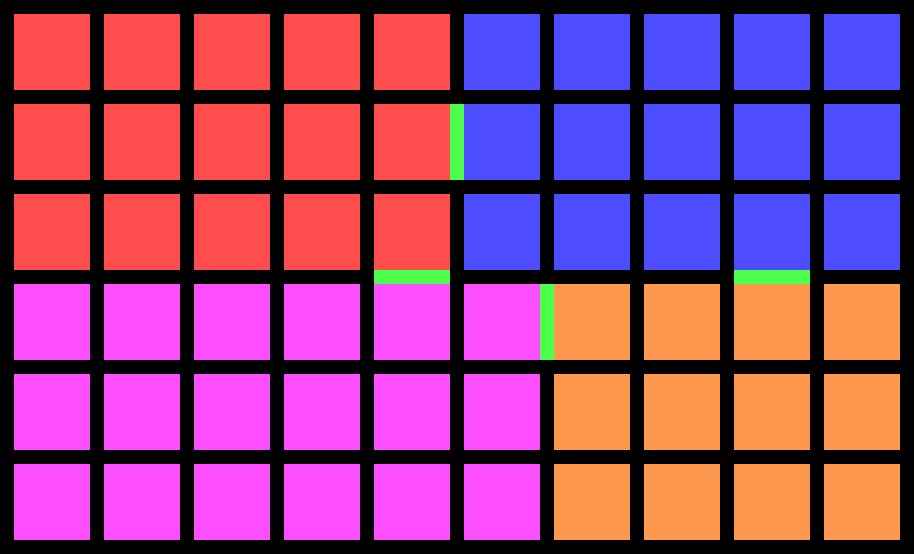
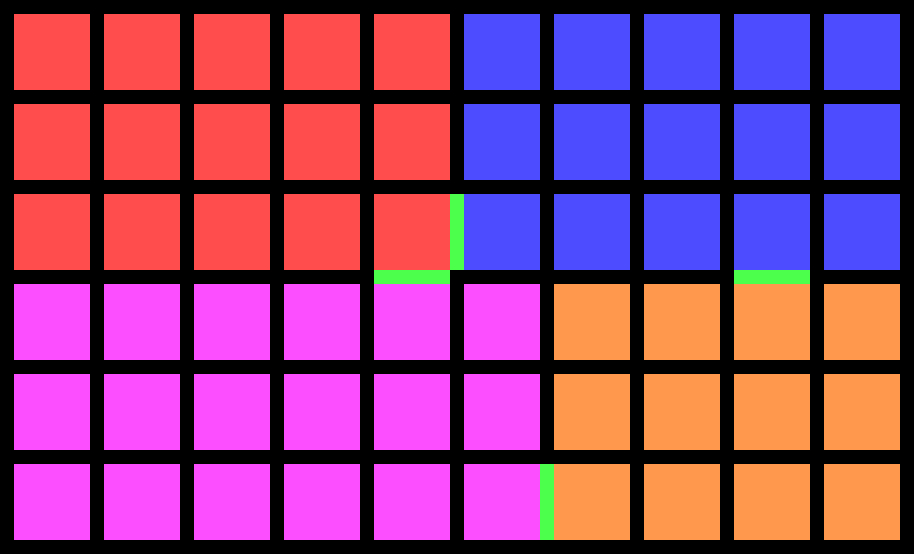
¶ MoveFeatureInDirection
Move feature by (OffsetX, OffsetY) for an assigned number of steps OR by distance along the wall in the same orientation as the feature in direction (OffsetX, OffsetY), whichever is lesser.
 |
|---|
| Before |
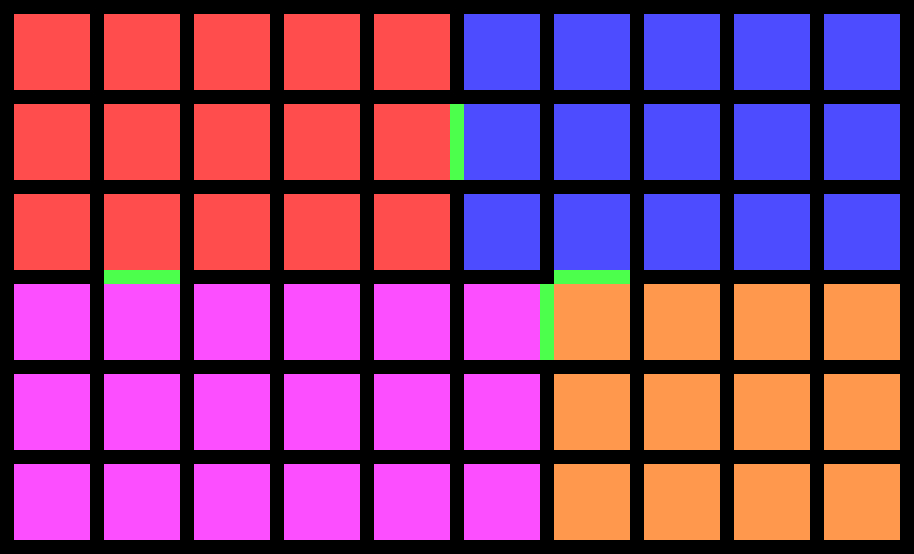 |
| OffsetX = -3 OffsetY = 0 |
 |
| OffsetX = 0 OffsetY = -2 |
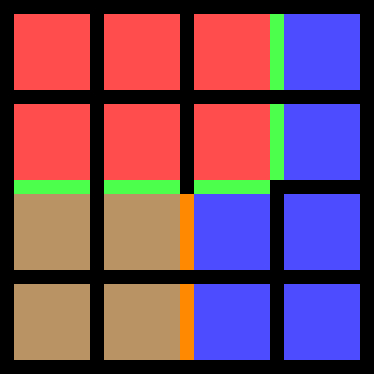
¶ ReplaceFeaturesByRoomType
Change all features to an assigned Feature Type if the feature joins two tiles with Room Type matching the filter.
For this example, the two different feature colors represent different Feature Type. Additionally,
RoomType.Dining is brown
RoomType.Kitchen is red
RoomType.Garden is blue
 |
 |
|---|---|
| Before | MatchingType1 = RoomType.Dining MatchingType1 = RoomType.Garden |
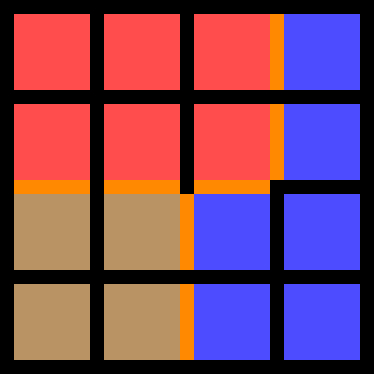
¶ SwitchFeatures
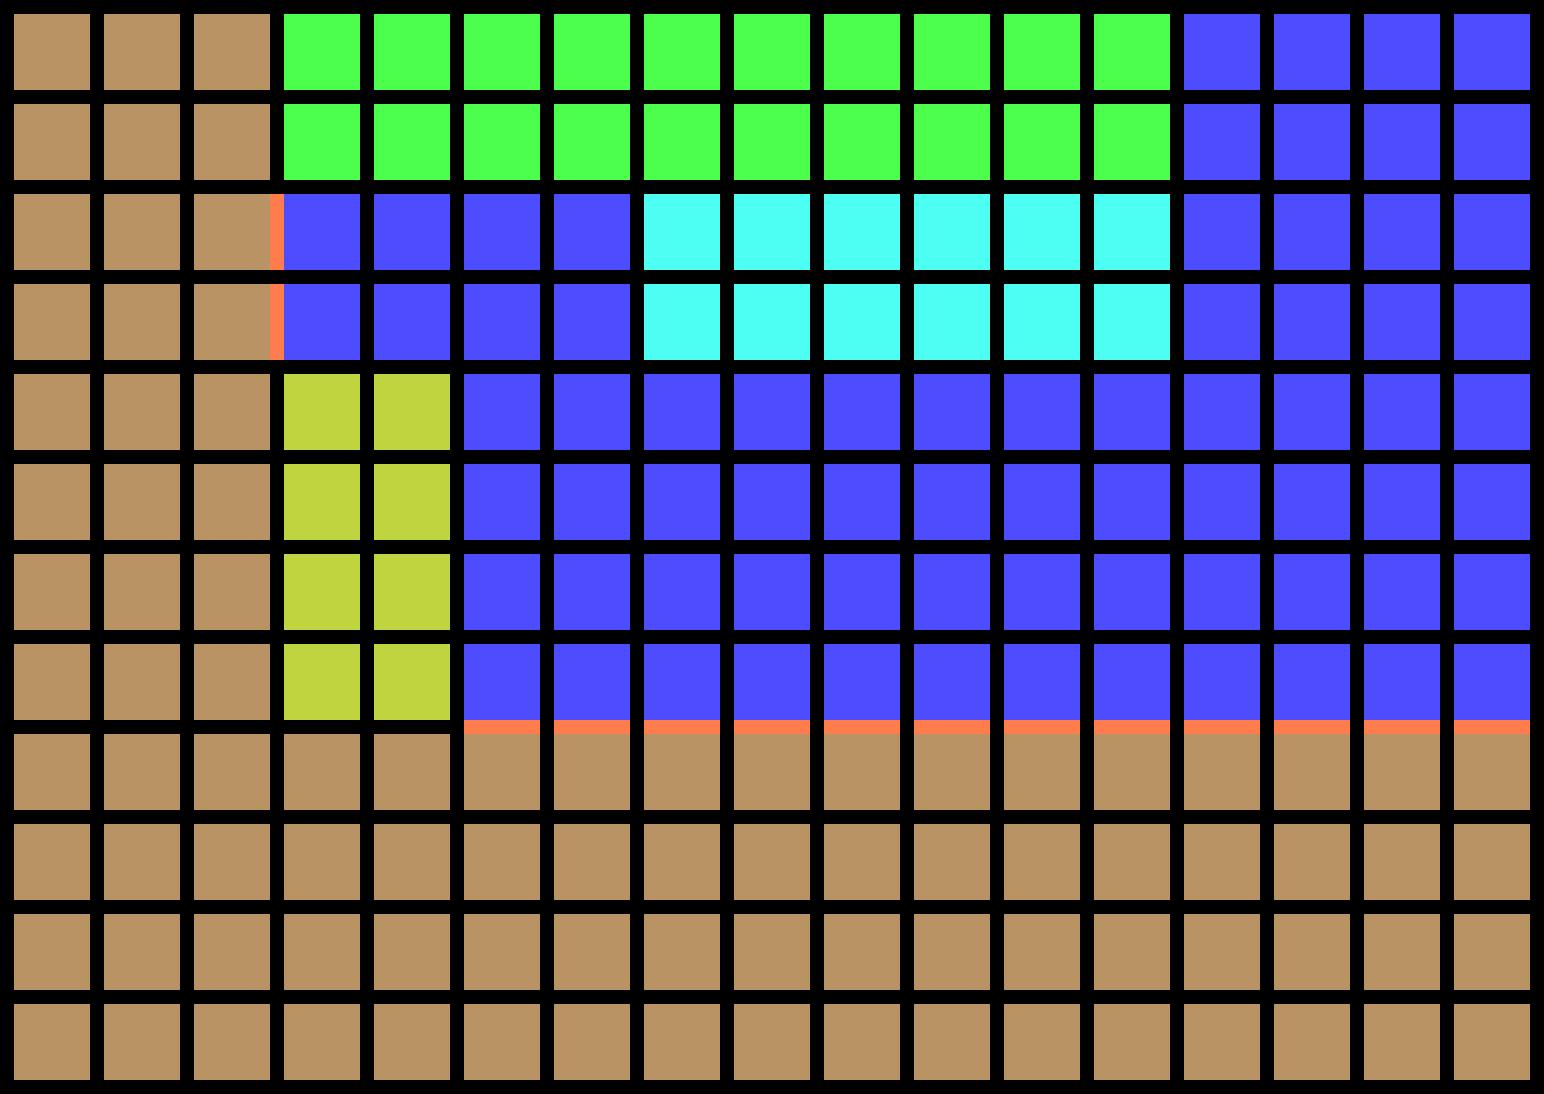
Change all features to an assigned Feature Type.
 |
 |
|---|---|
| Before | After |
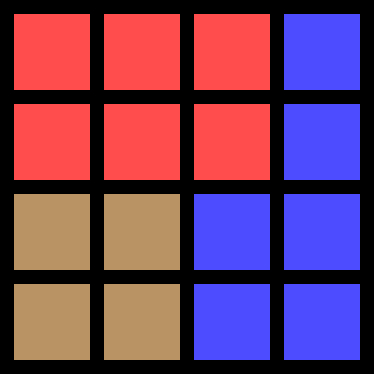
¶ FullyConnect
Randomly add one Door feature between each adjacent room pair.
 |
  |
|---|---|
| Before | After (Random. Non exhaustive) |
¶ AppendFeatures
Merge feature lists from multiple input LayoutBlueprint into one. If there are multiple features between the same tile pair, the first feature is used.
   |
 |
|---|---|
| Inputs | Output |
¶ Global Modifier Modules
This affects all tiles and features present.
¶ Mirror
Copy all tiles and features, reflecting about the right edge of the layout.
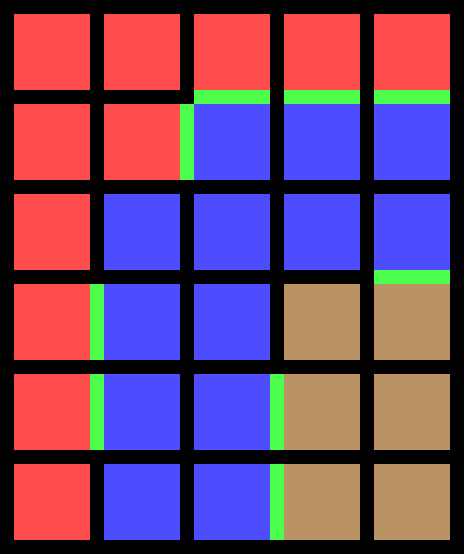 |
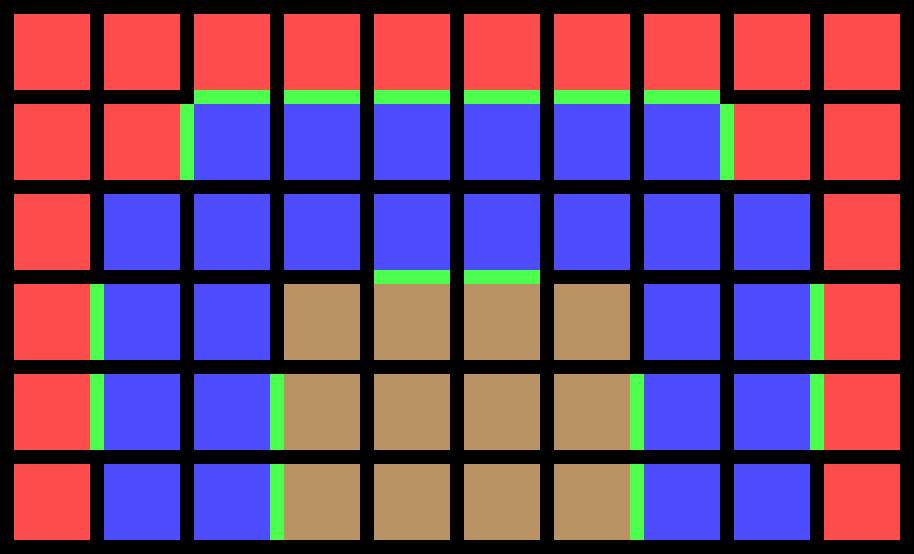 |
|---|---|
| Before (5x6) | After (10x6) |
¶ RecentreLayout
Redefine all tiles and features such that the centre tile, or thereabouts, is at LayoutPosition (0, 0).
¶ Conditional Modules
Checks if the layout meets certain criteria. If the layout fails to meet any one criterion, the entire LayoutBlueprint is rejected immediately. This is usually done at the end of the procedure.
¶ RequireAccessible
Ensures there is a path from the front door into each room through doors. Garden Room Type is ignored by default, meaning paths to a garden room are not required. If desired, Checking for a path to gardens can be enabled.
¶ RequireDoorPair
Ensures all rooms with Room Type1 are adjacent to at least one room with Room Type2. Must be used in conjection with RequireAccessible to ensure that a Door between the rooms exists. This is a misleading LayoutModule name.
¶ RequireFeatureCountEven
Ensures count of a specified Feature Type is even. (or odd, if RequireEven = false)
¶ RequireFeatures
Ensures count of a specified Feature Type is greater than or equal to a specified minimum count.
¶ RequireNoOverlaps
Ensures no two features share the same tile pair.
¶ Output Module
You must have exactly one output module.
¶ Output
This is a special module from which the final LayoutBlueprint is read.
¶ Example LayoutGraph
This will likely look very familiar once it's done
| Example 1 | ||||||||
|---|---|---|---|---|---|---|---|---|
| 1 | RoomGrid Width = 3 Height = 2 |
 |
||||||
| 2 | MergeRoomsByType | 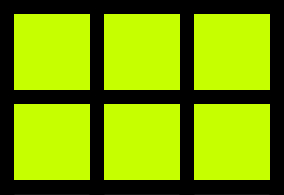 |
||||||
| 3 | SwapRoomType X = 0 Y = 0 Type = Kitchen |
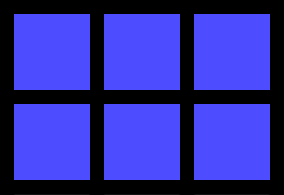 |
||||||
| 4 | InsertRandomRoom Type = Unassigned |
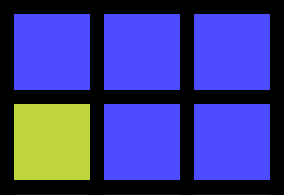 |
||||||
| 5 | InsertRandomRoom Type = Unassigned |
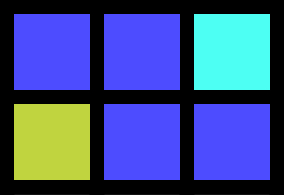 |
||||||
| 6 | SplitRooms UniformX = 1 UniformY = 1 RandomX = 0 RandomY = 1 |
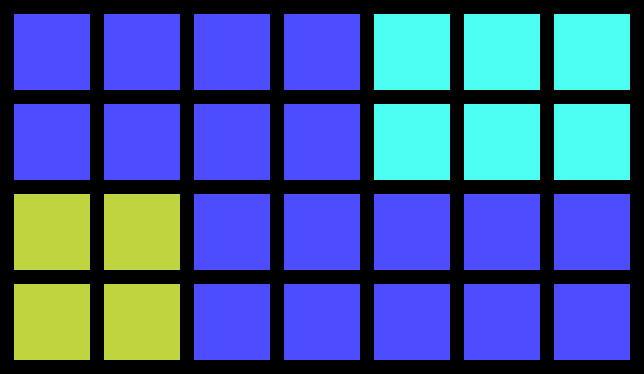 |
||||||
| 7 | PadWithRoom Type = NoRoom Above = 2 |
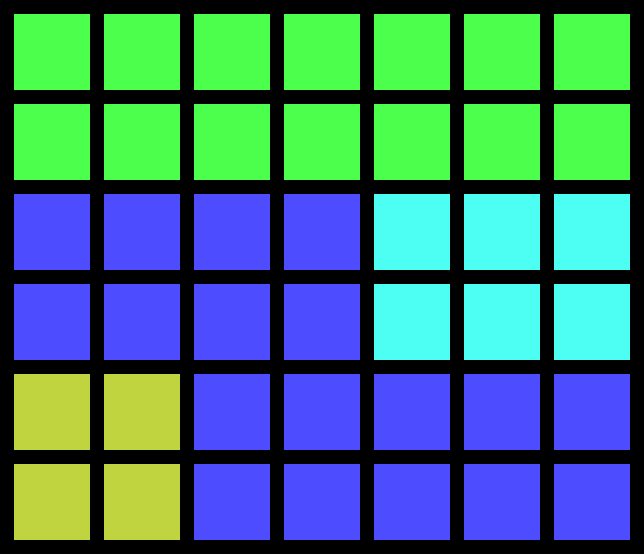 |
||||||
| 8 | PadWithRoom Type = Kitchen Right = 4 |
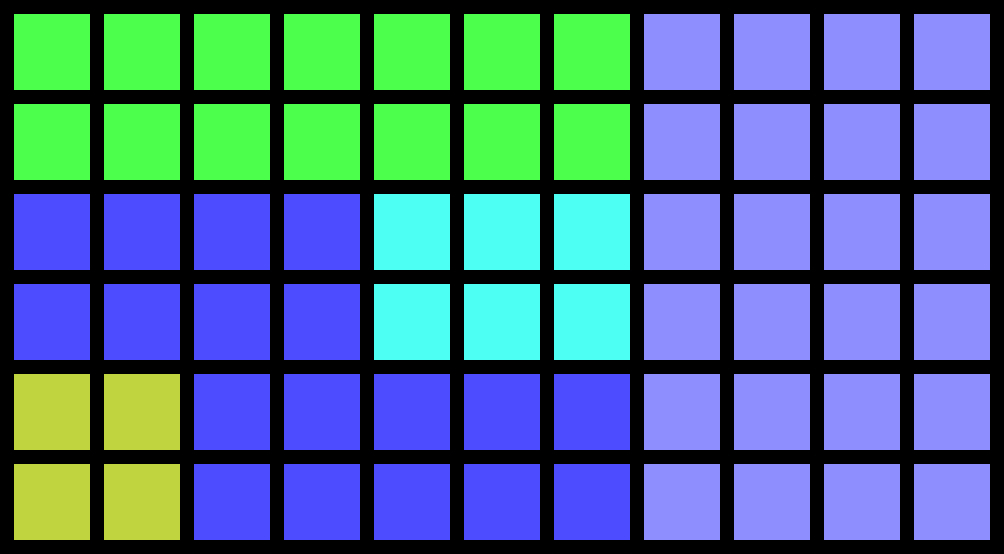 |
||||||
| 9 | PadWithRoom Type = Dining Left = 3 Below = 4 |
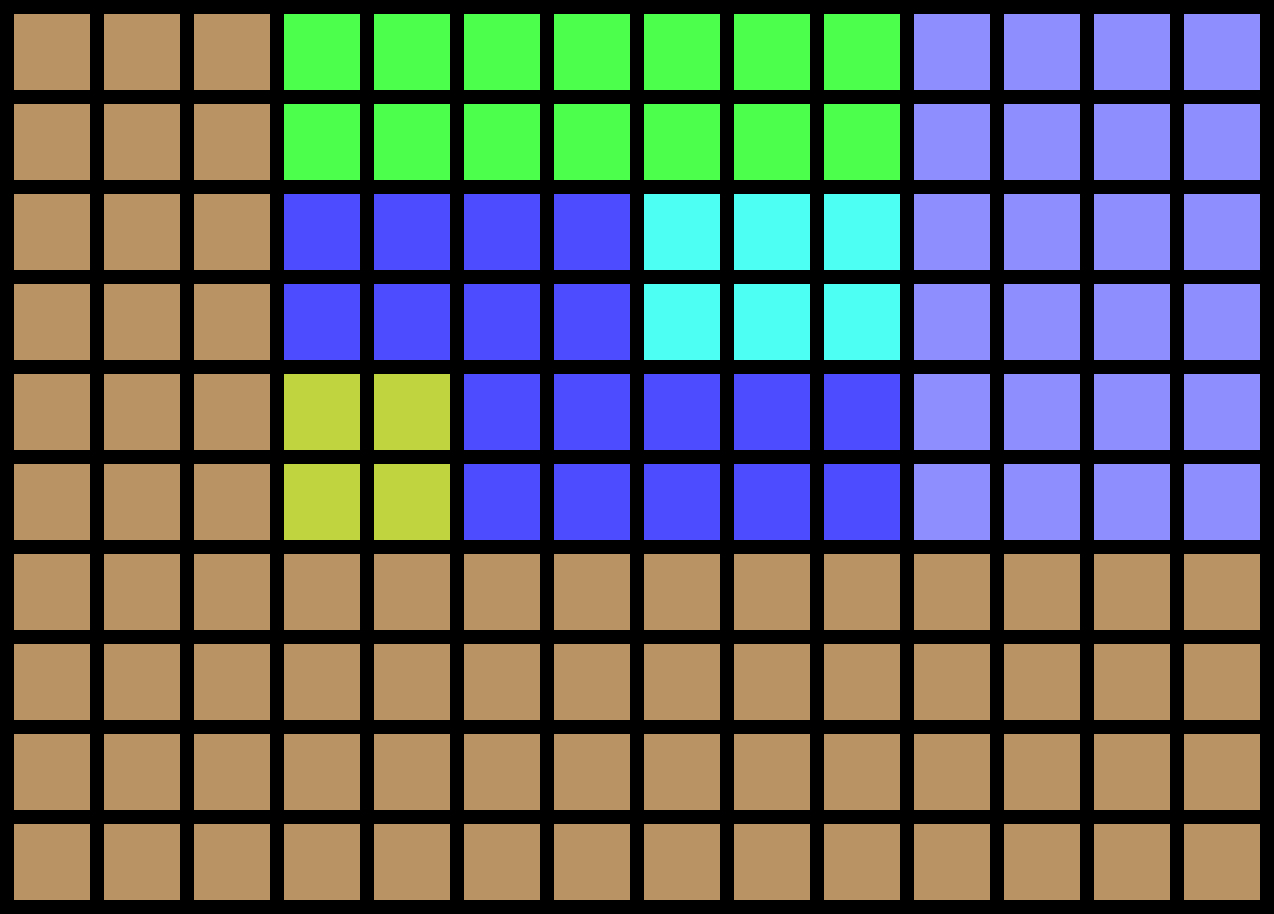 |
||||||
| 10 | MergeRoomsByType | 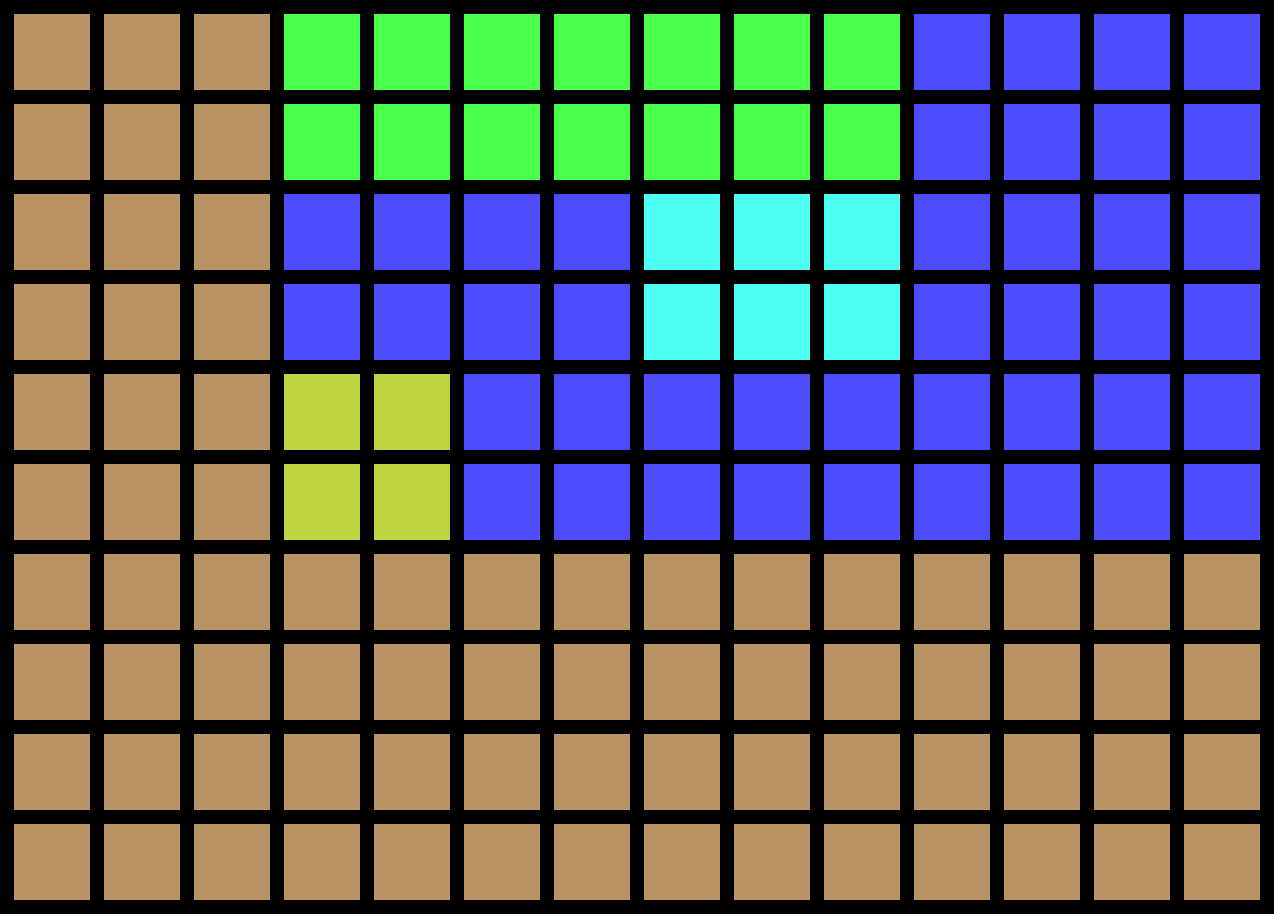 |
||||||
| 11 | SplitLine Position = 5 Count = 2 IsRow = false |
 |
||||||
| 12 | SplitLine Position = 0 Count = 1 IsRow = true |
 |
||||||
| 13 | RecentreLayout | No Significant Change | ||||||
| A1 | CreateFrontDoor Type = Dining ForceFirstHalf = false |
 |
B1 | FindAllFeatures Type = Door |
 |
|||
| C1 | FilterByRoom RemoveMode = true FilterSecond = false Type1 = NoRoom |
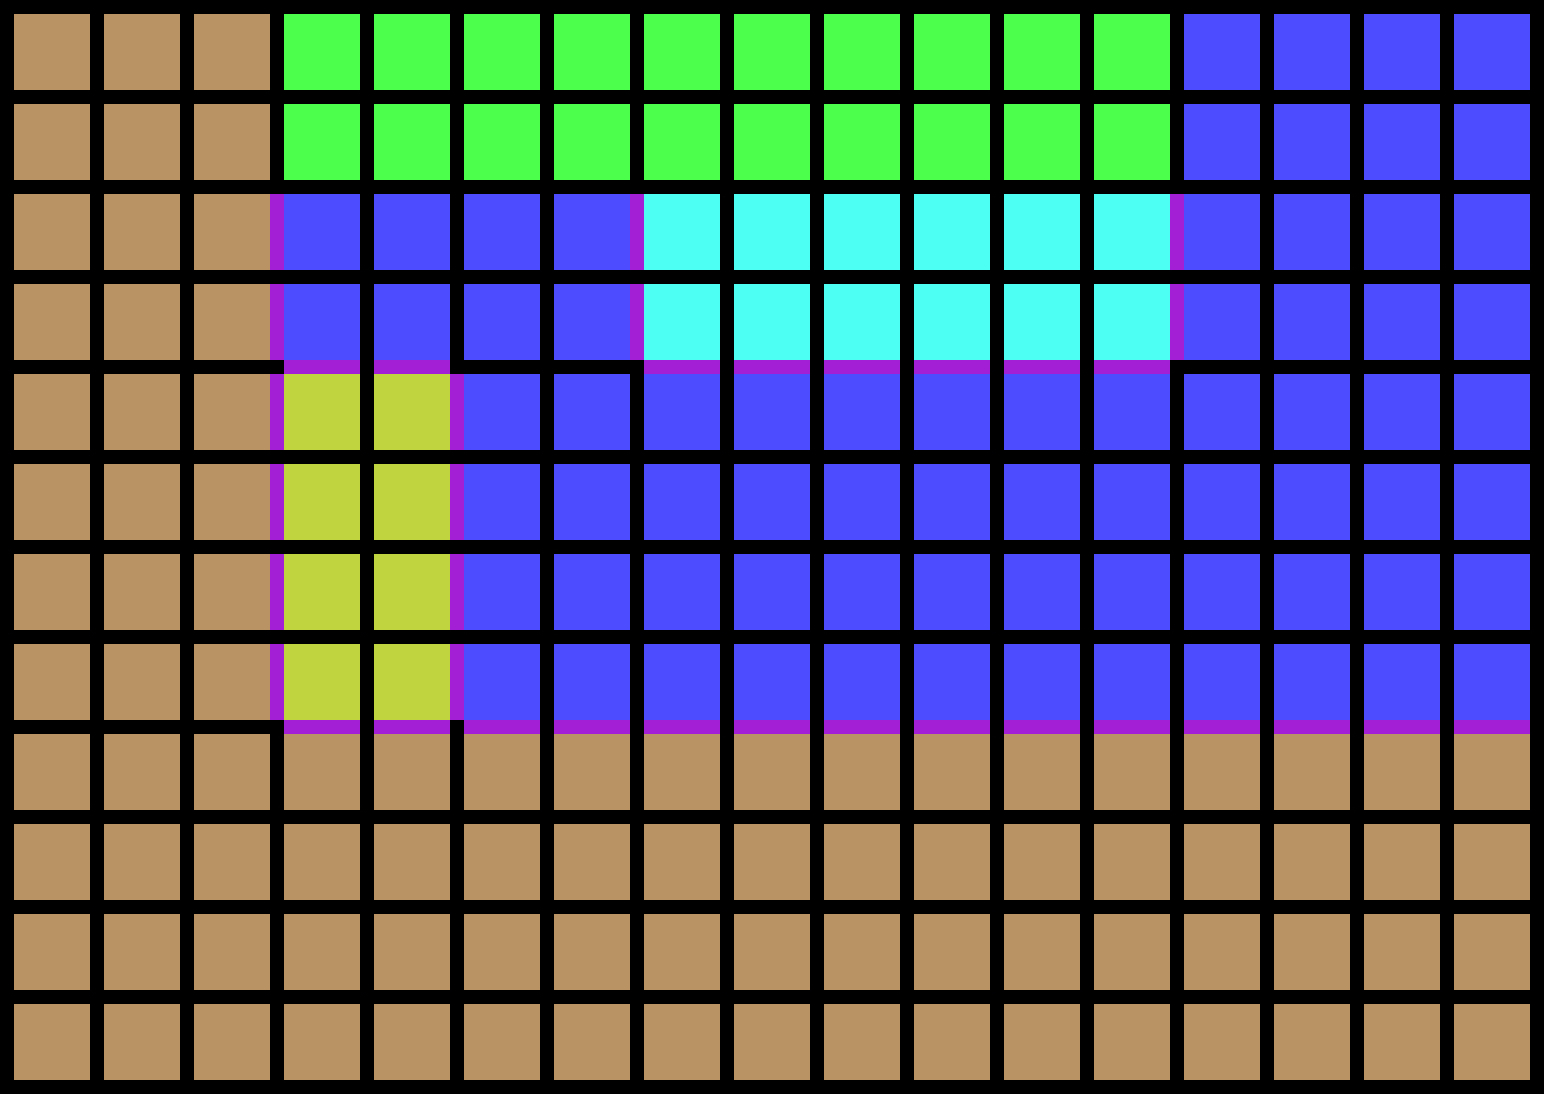 |
D1 | FilterByRoom RemoveMode = false FilterSecond = true Type1 = Kitchen Type2 = Dining |
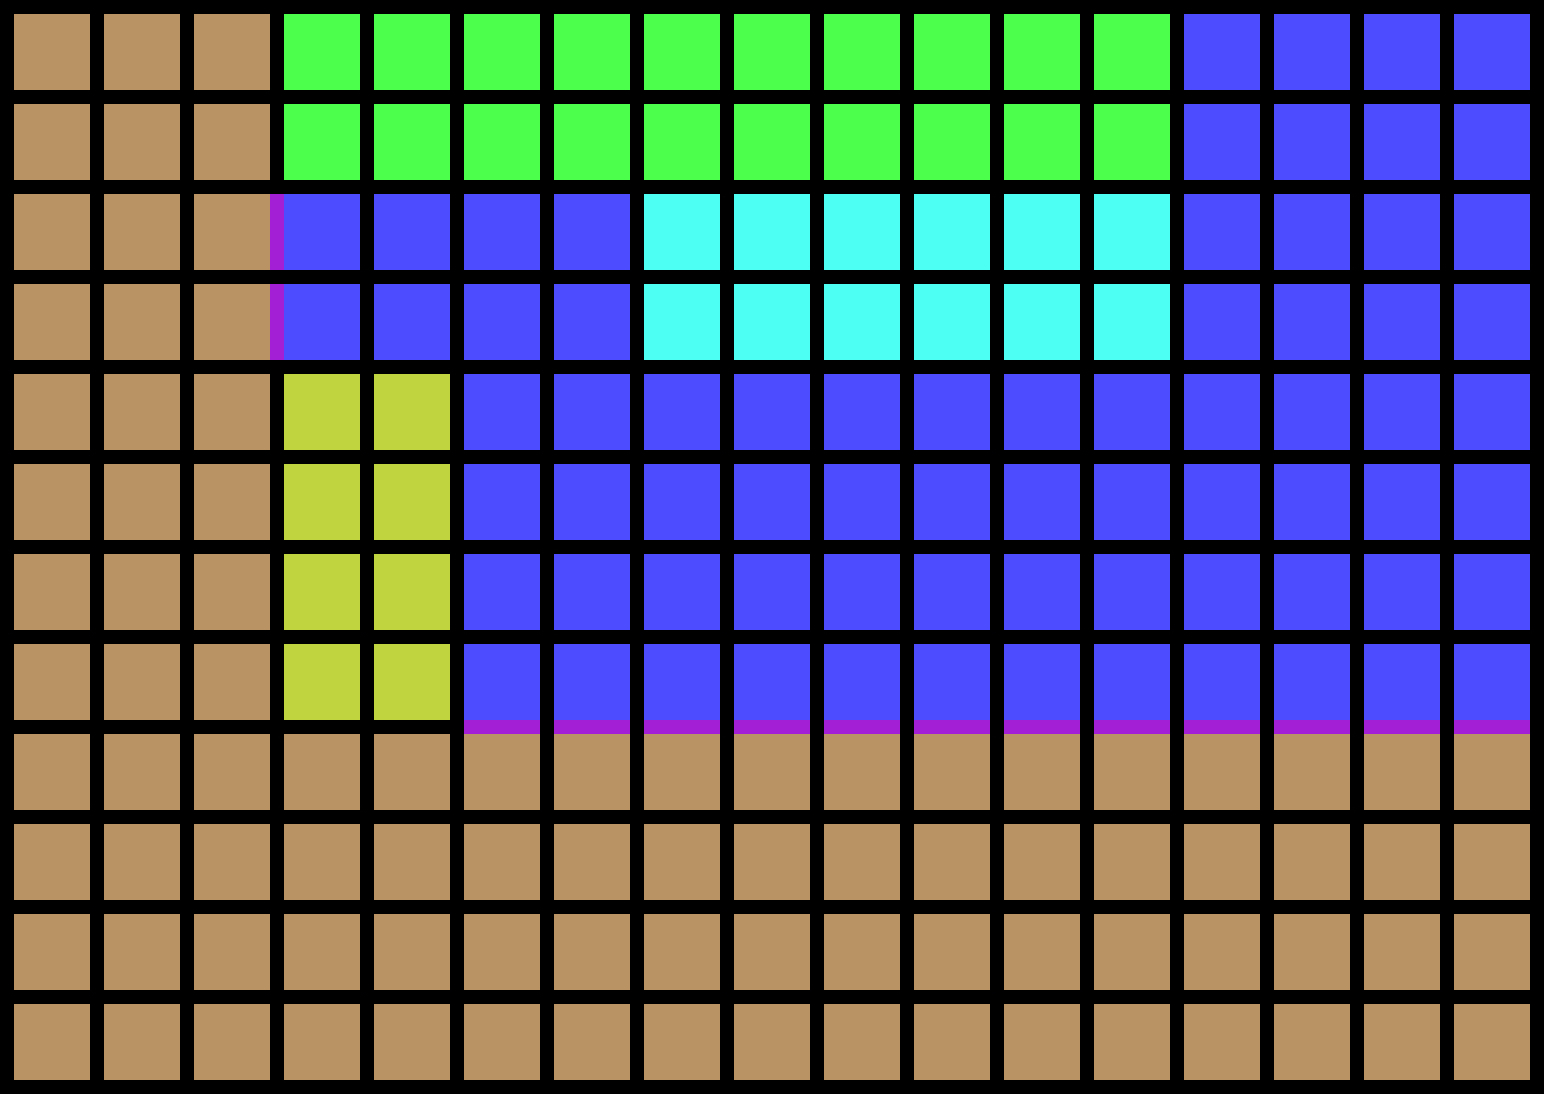 |
|||
| C2 | FilterByFreeSpace | 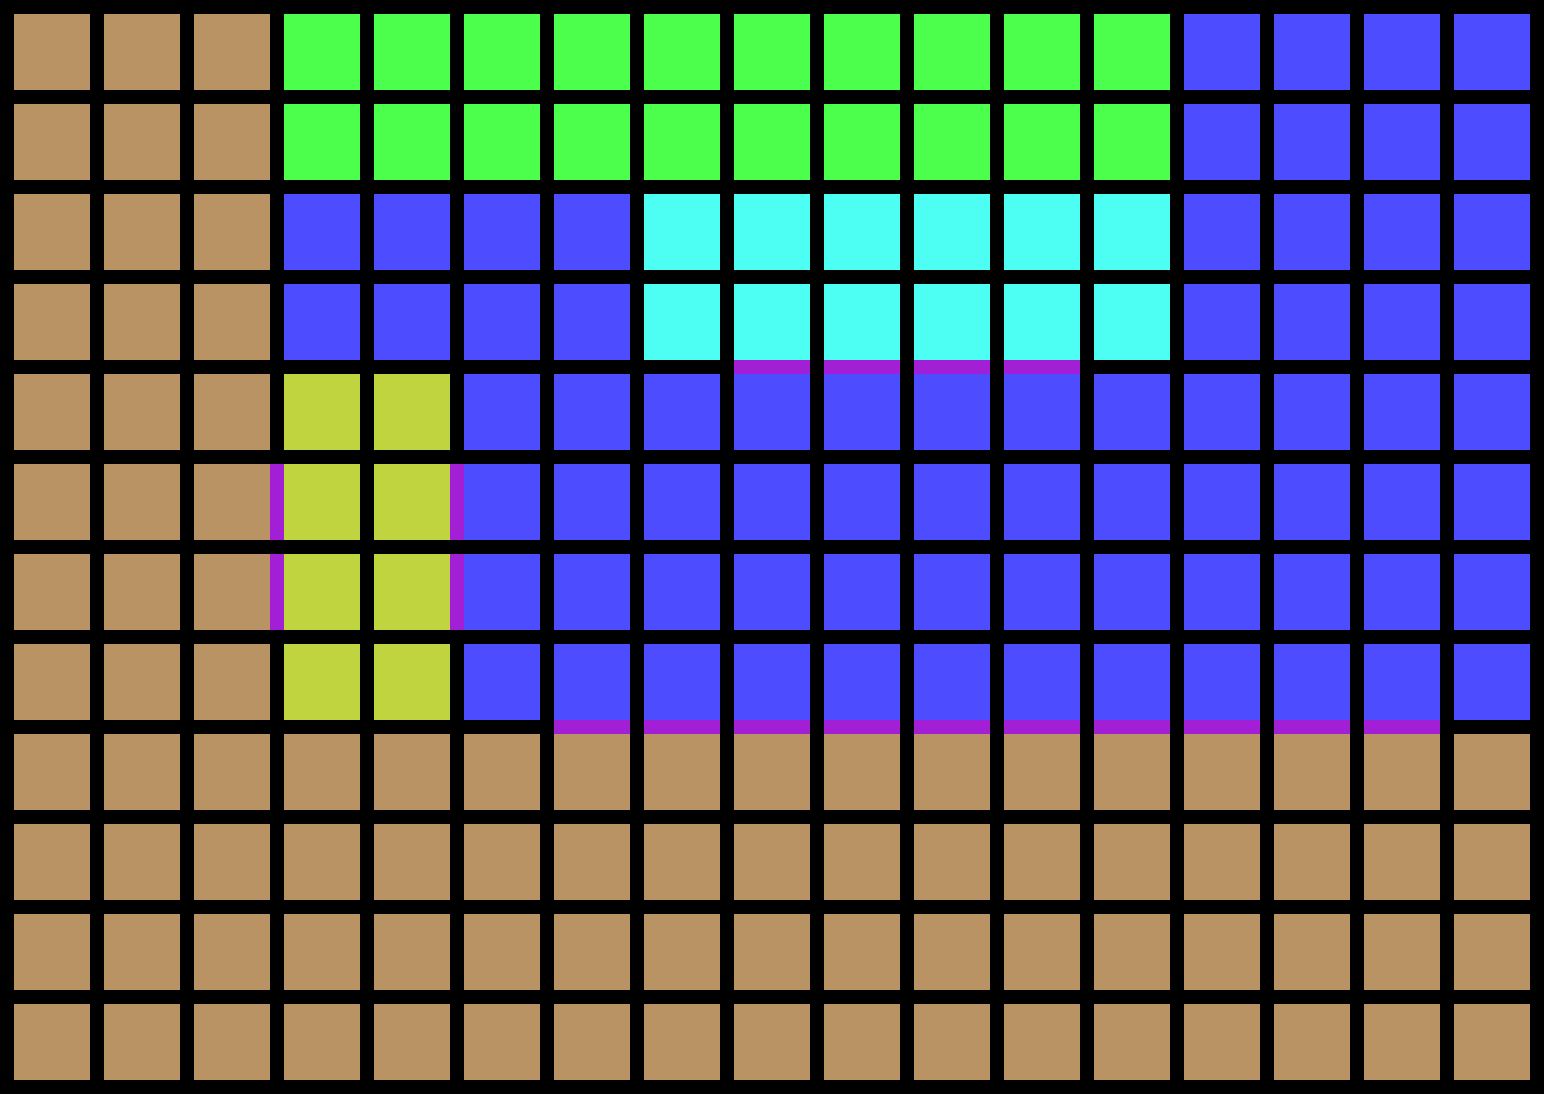 |
||||||
| C3 | FilterOnePerPair | 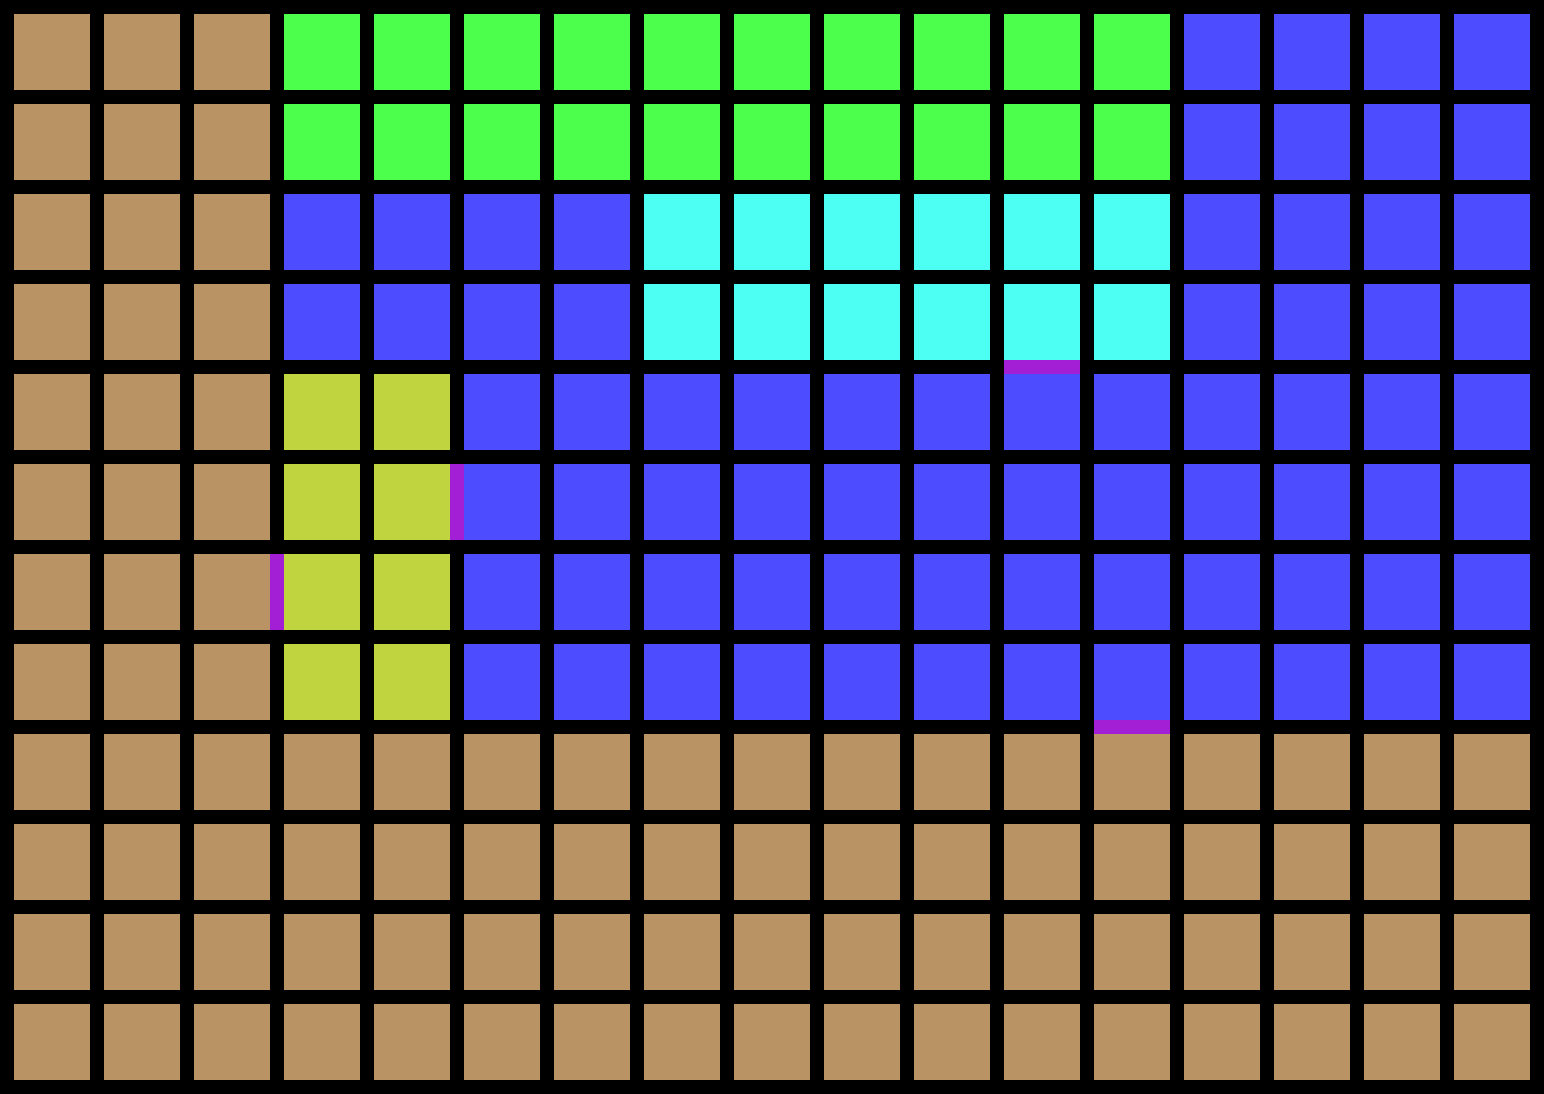 |
D2 | SwitchFeatures SetToFeature = Hatch |
 |
|||
| 14 | AppendFeatures | 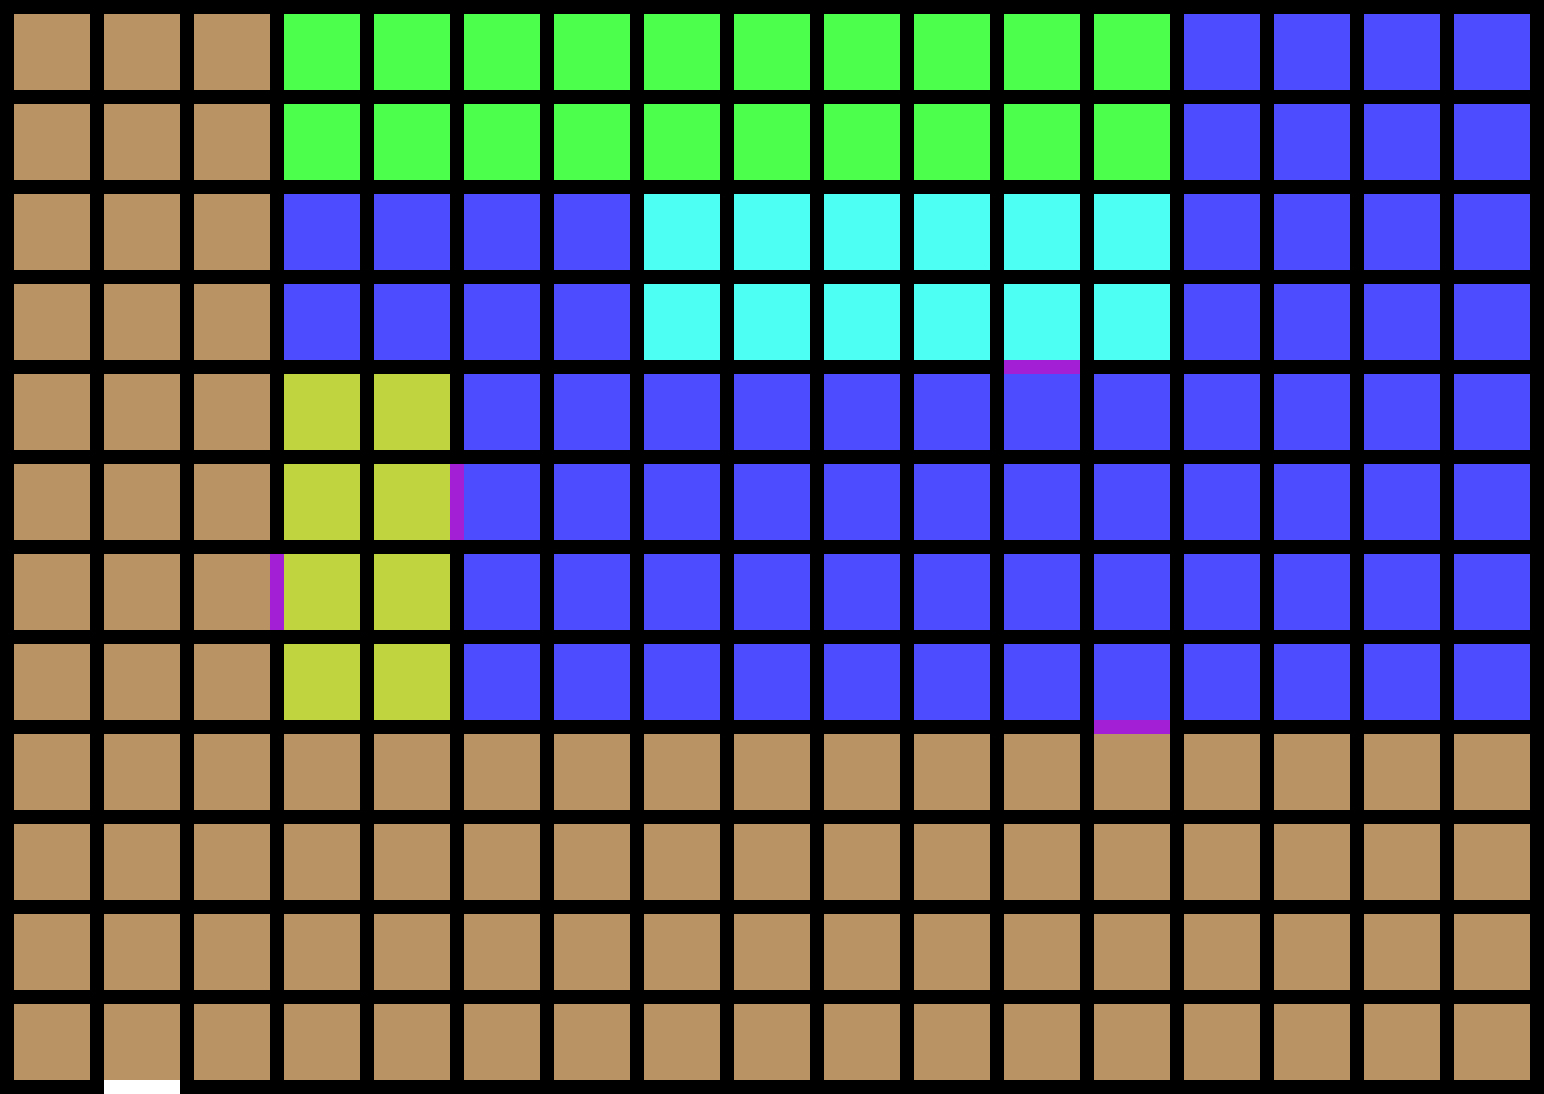 |
||||||
| 15 | AppendFeatures | 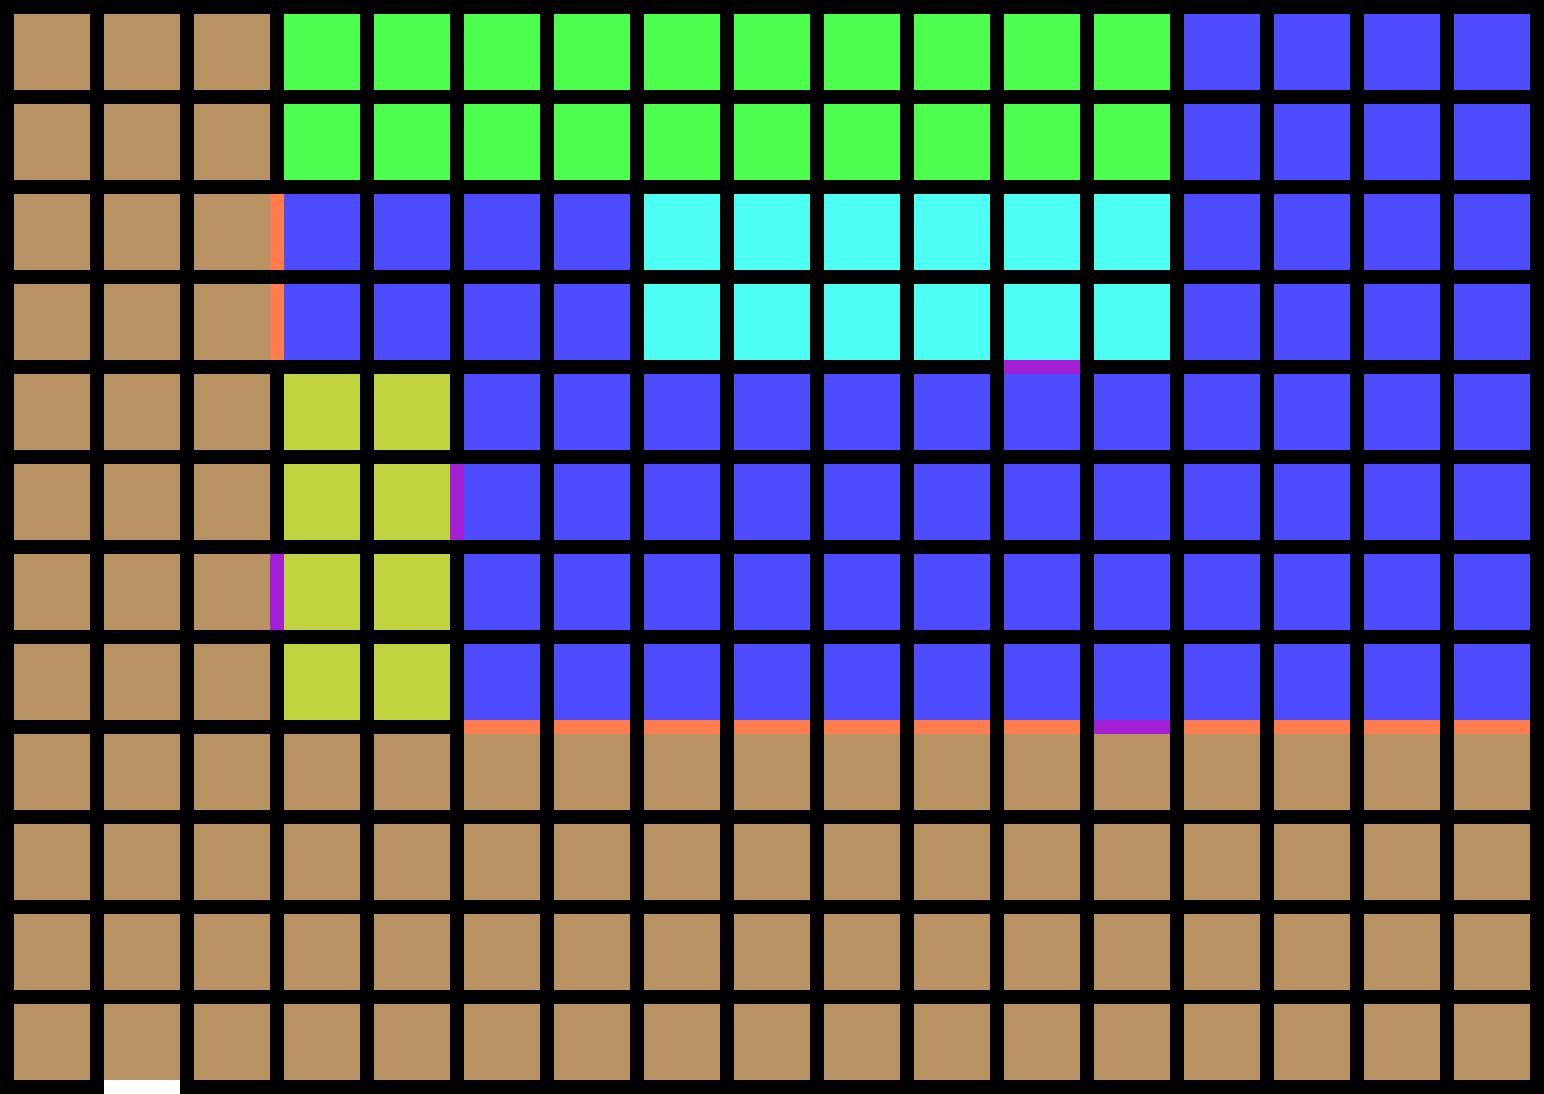 |
||||||
| 16 | RequireAccessible AllowGardens = false ResultStatus = true |
|||||||
| 17 | RequireFeatures Type = Hatch Minimum = 4 ResultStatus = true |
|||||||
| 18 | Output | |||||||
